Java Micronaut Local Development
🕓 30 minutes
What you’ll learn
How to set up your local development environment to:
- develop a Java Micronaut component;
- run the developed component in the local development mode on your machine.
Prerequisites
- Create a new CodeNOW component in your application:
- use the Java Micronaut scaffolder
- see the How to Create a New Application Component tutorial.
Prepare local development IDE
-
Clone code from the created git repository to your local machine.
-
Use your favourite IDE and import repository as a maven project. You will require:
- Java 11+
- Enable Maven support in your IDE and install Apache maven (if required) – http://maven.apache.org/ide.html
- Enable Micronaut support – https://docs.micronaut.io/latest/guide/#quickStart
- Make sure you enabled “Enable annotation processing” checkbox in your IDE’s maven configuration.
-
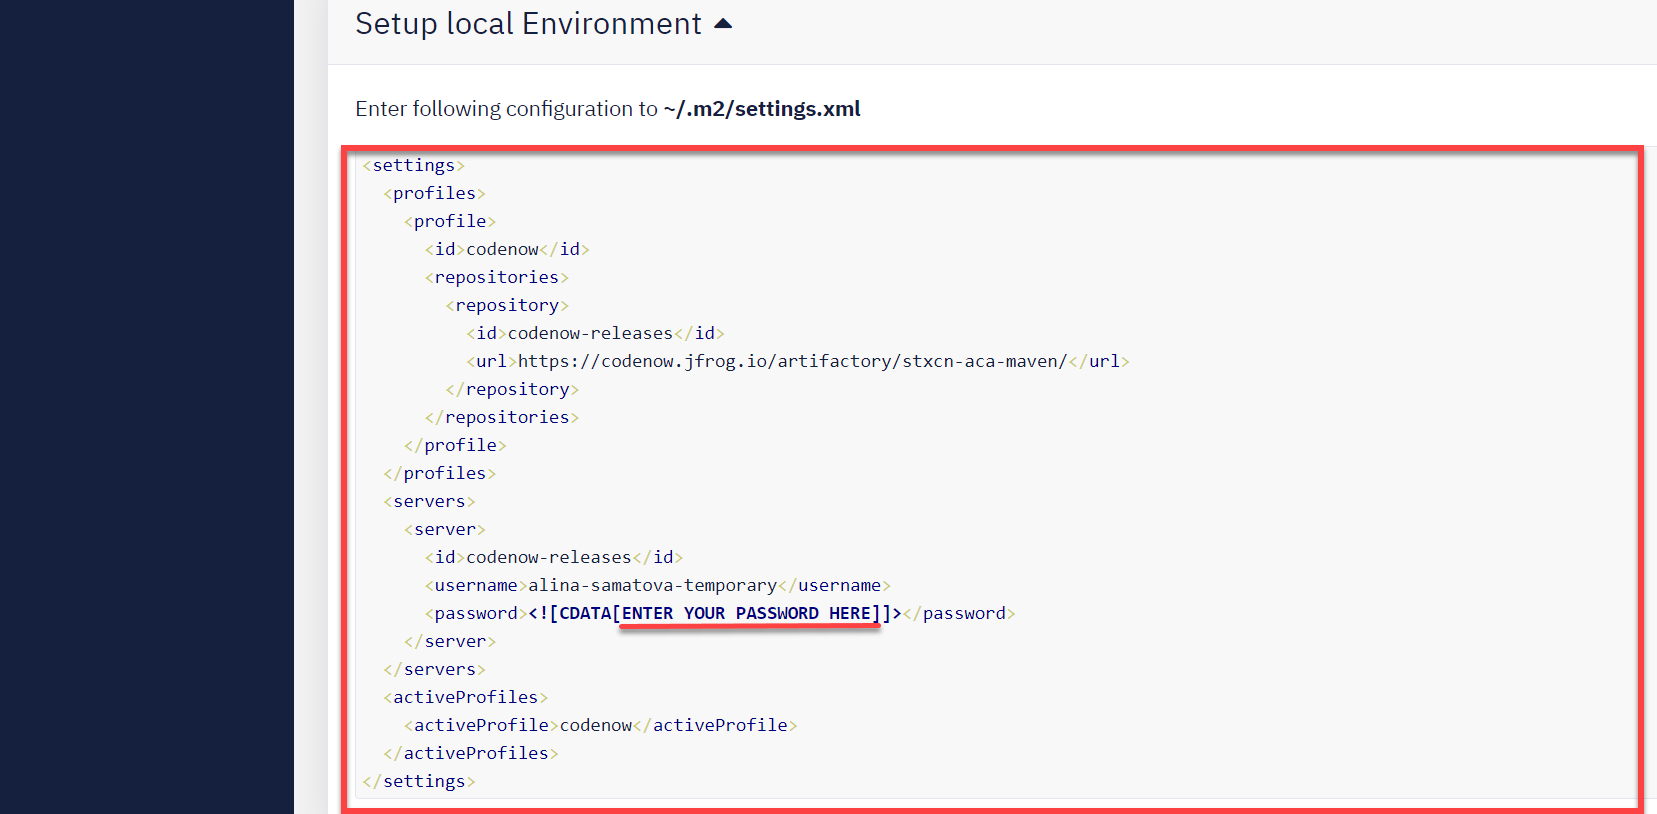
Set up your local environment:
- go to details of created component in CodeNOW;
- at the bottom of this page, you'll find the Setup local environment section;
- copy the configuration;
- find the
m2folder in your local computer (not always, but often it's inC:\Users\your_namepath); - create
settings.xmlfile there, if it does not exist already; - paste copied configuration to the file;
- don't forget to insert your CodeNOW password instead of
ENTER YOUR PASSWORD HERE; - Save the file.

- To run the project in the local development setup, check
README.md. The required minimum is to set the path to the Micronaut configuration file as a JVM startup parameter:-Dmicronaut.config.files=file:codenow/config/application.yaml- Check the Run configuration dialog in your IDE and set this line as a VM argument in the JVM options.
- Set up run configurations in the IntelliJ IDEA's IDE.
- You can also configure this server to listen on a custom port (the default port is 8080).
-Dserver.port=9090- This comes in handy when running multiple projects at once, which is very common with microservice-oriented architectures.
- Start Run/Debug in your IDE.
- The component should successfully start up with port 8080 exposed
- Check the swagger-ui by clicking on http://localhost:8080/swagger/index.html
- For more information about the Swagger UI check: https://swagger.io/tools/swagger-ui/
- Swagger UI is used as a simple swagger presentation UI.
- Any changes must apply to the swagger.yaml in the src/main/resources/META-INF/swagger directory
- The same swagger UI is used as a documentation tool and is also an easy way to test the functionality of your component’s API.
Docker Compose and third-party tools
Some manuals for CodeNOW work with different third-party components like Apache Kafka or Redis. The easiest way for local development is to download the publicly available docker compose receipts. Some examples used during the writing of this manual:
Set up run configurations in the IDE IntelliJ IDEA
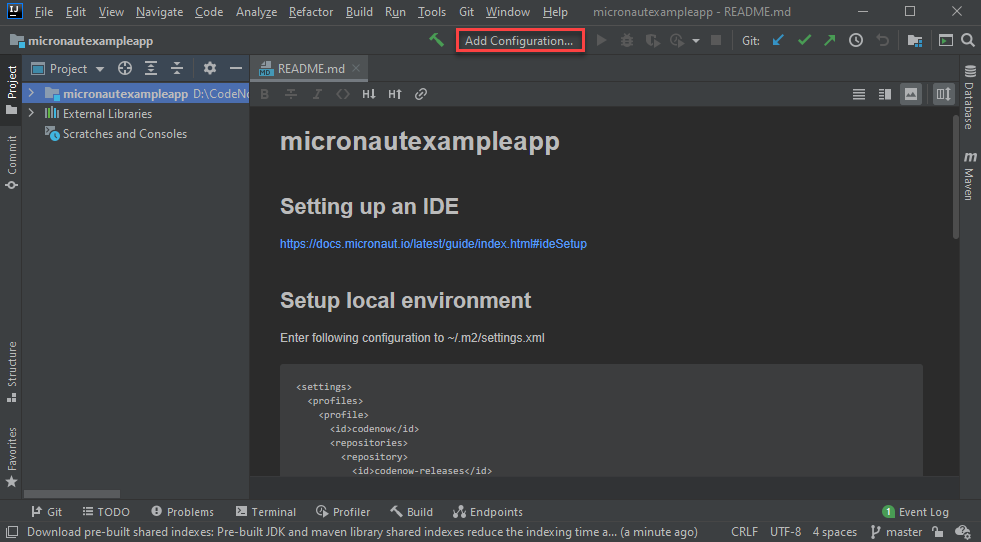
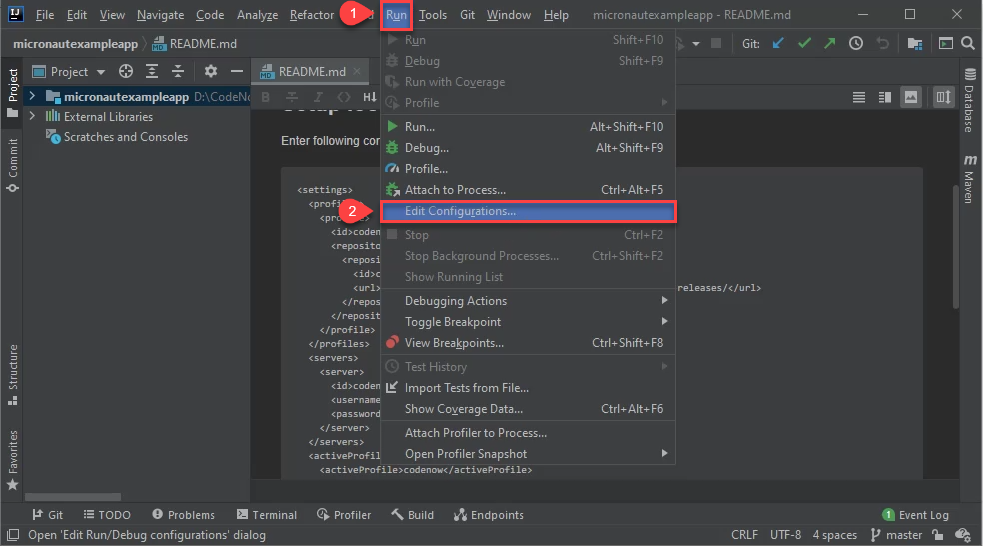
There are two ways to display the run/debug configuration settings in the IntelliJ IDEA:
- Click on the "Add configuration" button at the top of the screen. In the version of the IntelliJ IDEA dating from 2021, the button is located in the upper-left corner. In earlier versions, it is located in the upper-right corner.

It is also possible to use the top menu by clicking on the "Run" and "Edit Configuration...".

-
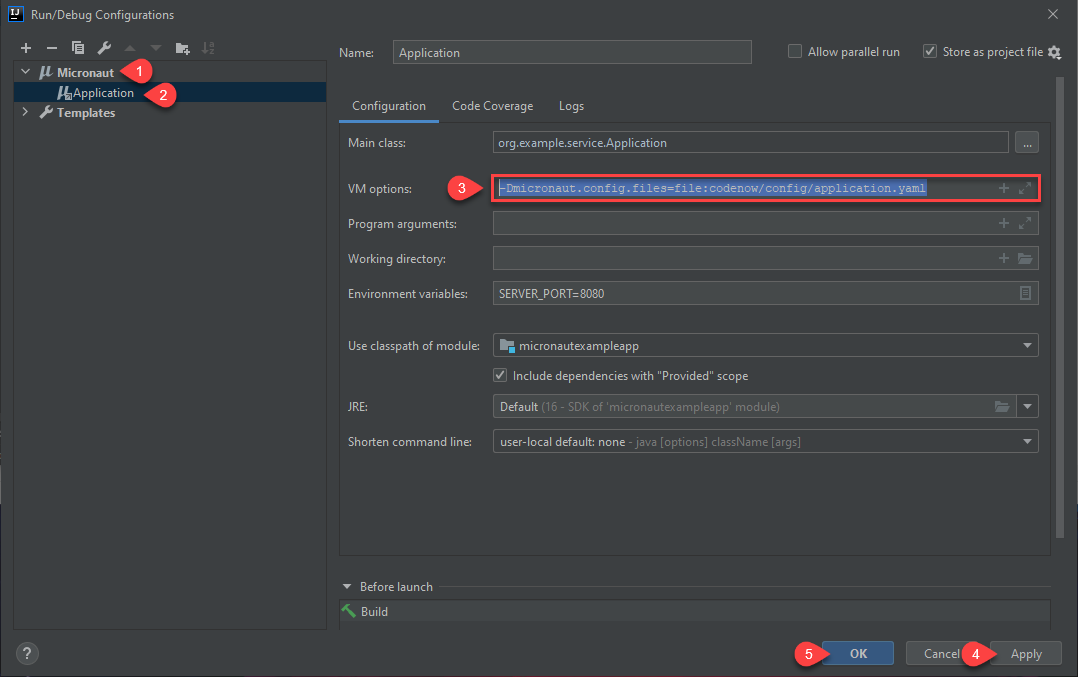
In the Run/Debug Configurations dialog, follow the steps in the picture. In the Micronaut Application Configuration, set this line in the VM options:
-Dmicronaut.config.files=file:codenow/config/application.yaml
Then click on the "Apply" button. Confirm your changes by clicking on the "OK" button.

What's next?
See our other developer tutorials: