Java Micronaut REST API
🕓 45 minutes
What you’ll learn
How to set up your application for:
- getting data from a REST API,
- providing data to a REST API.
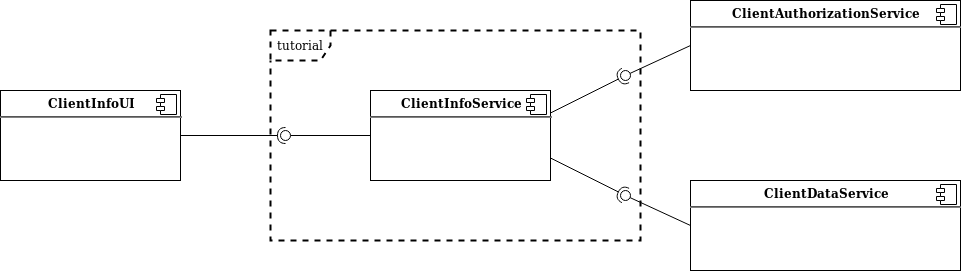
In this tutorial, we will create a simple Java component with the Java Micronaut scaffolder. We want to expose the single REST endpoint for getting user details for his username only. This will require a simple sequential orchestration of two REST services, first to get user authorization privileges and second for basic user details.
Project source
This example project can be cloned from its source repository.
Prerequisites
- Prepare your local development environment for CodeNOW with Micronaut.
- Follow the tutorial instructions in the Java Micronaut Local Development tutorial.
- Create a new component
- For details, see the section Prerequisites of the Java Micronaut Local Development tutorial.
Steps
Open your IDE, import the created component and start coding:
-
Define the message payload. Here is an example of the
GetClientInfoResponse, which is a simple POJO with basic user details and roles:-
Generate getters and setters with your IDE.
-
Examples of
GetClientDataResponseandGetClientRolesResponsecan be found in the example project repository.package io.codenow.client.info.service.model;
import java.time.LocalDate;
import java.util.Set;
public class GetClientInfoResponse {
private String firstname;
private String surname;
private LocalDate birthdate;
private Set<String> roles;
}
-
-
Next, create HTTP clients for calling the orchestrated endpoints. Example for
ClientDataServiceClient:-
The second required client
ClientAuthorizationServiceClientcan be found in the example project repository. -
For more details about Micronaut clients, please refer to the corresponding Micronaut's documentation
-
Create a new Java interface:
package io.codenow.client.info.service.clients;

import io.codenow.client.info.service.model.GetClientDataResponse;
import io.micronaut.http.annotation.Get;
import io.micronaut.http.annotation.PathVariable;
import io.micronaut.http.client.annotation.Client;
import io.reactivex.Single;

@Client("http://client-data-service")
public interface ClientDataServiceClient {

    @Get("/data/{username}")
    public Single<GetClientDataResponse> getClientData(@PathVariable String username);
}
-
-
Create a new controller and put all the parts together
-
For more details, see the corresponding Micronaut's documentation
package io.codenow.client.info.service.controller;

import java.util.Set;

import org.slf4j.Logger;
import org.slf4j.LoggerFactory;

import io.codenow.client.info.service.clients.ClientAuthorizationServiceClient;
import io.codenow.client.info.service.clients.ClientDataServiceClient;
import io.codenow.client.info.service.model.GetClientDataResponse;
import io.codenow.client.info.service.model.GetClientInfoResponse;
import io.codenow.client.info.service.model.GetClientRolesResponse;
import io.micronaut.http.annotation.Consumes;
import io.micronaut.http.annotation.Controller;
import io.micronaut.http.annotation.Get;
import io.micronaut.http.annotation.PathVariable;
import io.micronaut.http.annotation.Produces;
import io.micronaut.validation.Validated;
import io.reactivex.Single;

@Validated
@Controller("/info")
public class ClientInfoController {

    private static final Logger LOG = LoggerFactory.getLogger(ClientInfoController.class);

    private ClientAuthorizationServiceClient clientAuthorizationServiceClient;
    private ClientDataServiceClient clientDataServiceClient;

    public ClientInfoController(ClientAuthorizationServiceClient clientAuthorizationServiceClient,
         ClientDataServiceClient clientDataServiceClient) {
     super();
     this.clientAuthorizationServiceClient = clientAuthorizationServiceClient;
     this.clientDataServiceClient = clientDataServiceClient;
    }

    @Get("/{username}")
    @Produces
    @Consumes
    public Single<GetClientInfoResponse> getClientInfo(@PathVariable String username) {
     LOG.info("username: {}", username);

     Single<GetClientRolesResponse> rolesResp = clientAuthorizationServiceClient.getClientRoles(username);
     Single<GetClientDataResponse> clientDataResp = clientDataServiceClient.getClientData(username);

     Set<String> roles = rolesResp.blockingGet().getRoles();
     GetClientInfoResponse response = new GetClientInfoResponse();
     response.setRoles(roles);
     GetClientDataResponse info = clientDataResp.blockingGet();
     response.setBirthdate(info.getBirthdate());
     response.setFirstname(info.getFirstname());
     response.setSurname(info.getSurname());

        return Single.just(response);
    }
}
-
-
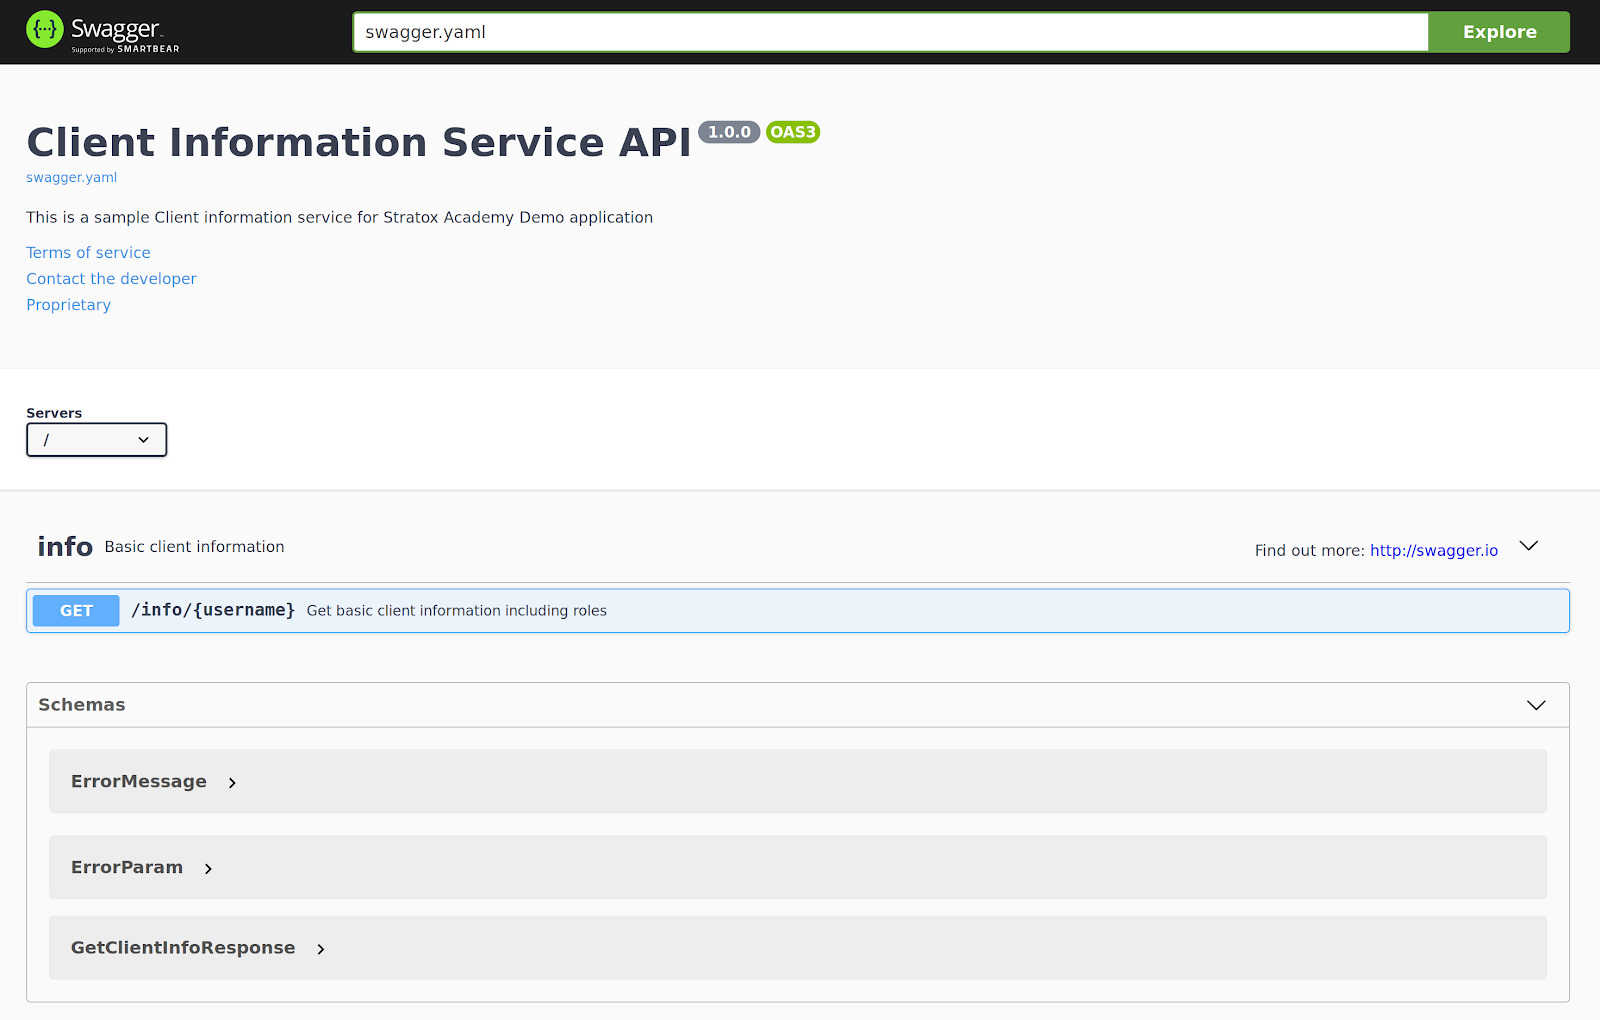
Do not forget to change the
swagger.yamlfile. Check it in the example project:src/main/resources/META-INF/swagger/swagger.yaml -
Try to build and run the application in your IDE. After startup, you should be able to access your new controller’s swagger at the following URL: http://localhost:8080/swagger/index.html
- For the correct setup, check the
README.mdin the project root or see the tutorial Java Micronaut Local Development, section Prepare local development IDE - The component exposes a simple GET endpoint and can be tested using a browser call only. You should not forget to document your API and use the swagger-ui accordingly.
- For the correct setup, check the
Deploy to CodeNOW
If your code works in the local development, you are ready to push your changes to Git and try to build and deploy your new component version to the CodeNOW environment.
- For more information about application deployment, see Application Deployment and Deployment Monitoring tutorials.
What's next?
See our other developer guides: