Java Spring Boot Local Development
🕓 30 minutes
What you’ll learn
How to set up your local development environment to:
- develop a Java Spring Boot component;
- run on your machine the developed component in the local development mode.
Prerequisites
- Create a new CodeNOW component in your application:
- use the Java Spring Boot scaffolder.
- see the How to Create a New Application Component tutorial.
Prepare local development IDE
-
Clone code from the created git repository to your local machine.
-
Use your favourite IDE and import the cloned repository as a Maven project. You will need to:
- have Java 11+ installed;
- enable Maven support in your IDE;
- install Apache Maven if not already installed.
-
Set up your local environment:
- go to details of created component in CodeNOW;
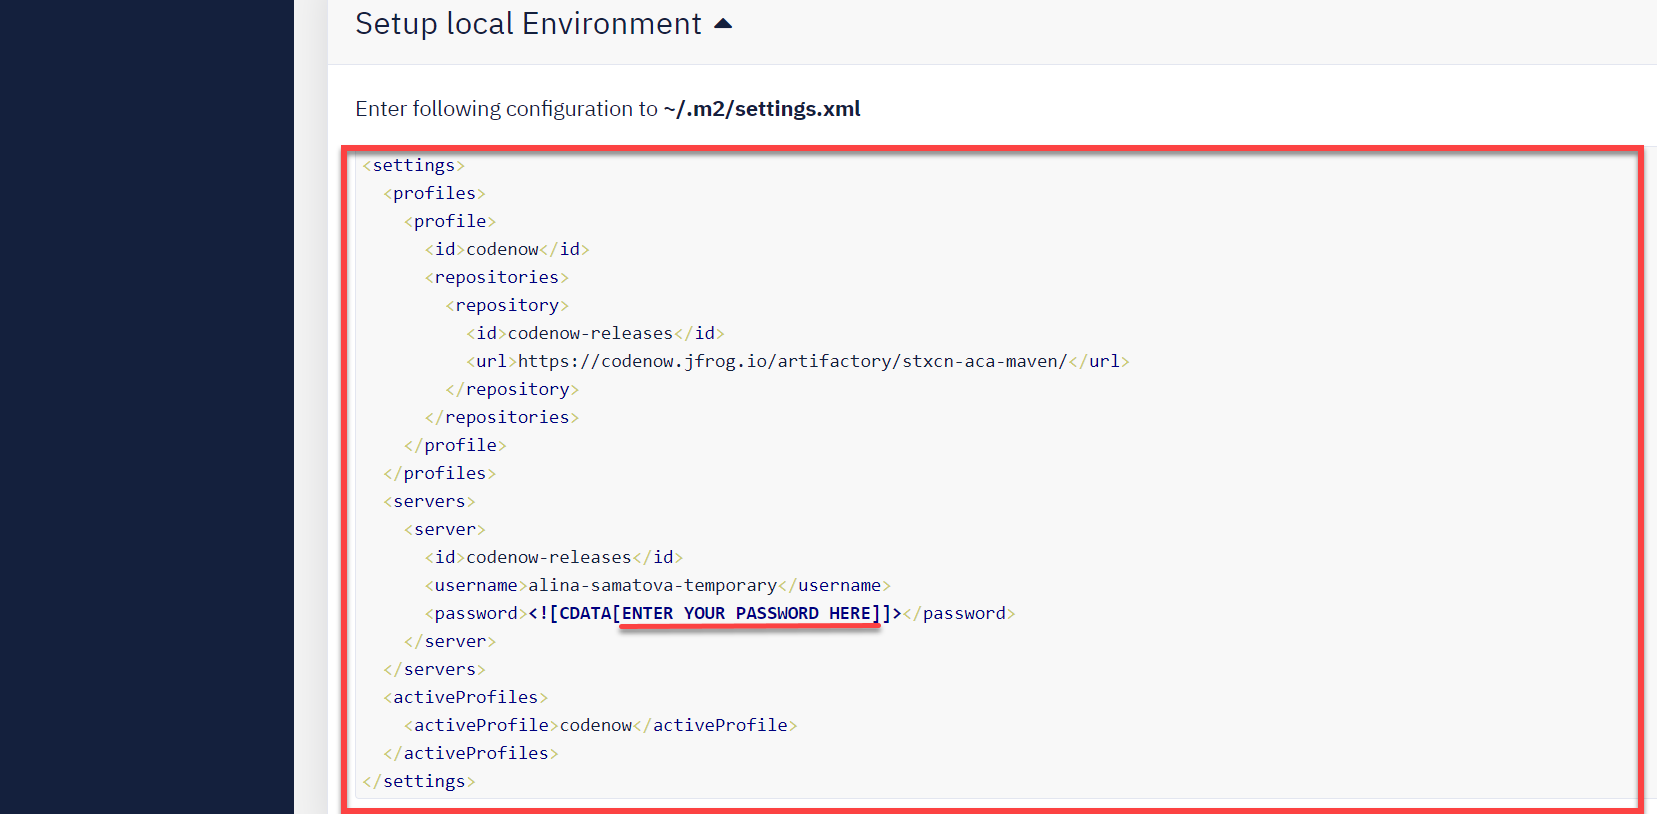
- at the bottom of this page, you'll find the Setup local environment section;
- copy the configuration;
- find the
m2folder in your local computer (not always, but often it's inC:\Users\your_namepath); - create the
settings.xmlfile there, if it does not exist already; - paste the copied configuration to the file;
- don't forget to insert your CodeNOW password instead of
ENTER YOUR PASSWORD HERE; - save the file.

- To run the project in the local development setup, check the
README.mdfile. The required minimum is to set the path to the Spring Boot configuration file as a JVM startup parameter:-Dspring.config.location=file:./codenow/config/application.yaml- Check the Run configuration dialog in your IDE and set this line as a VM argument in the JVM options.
- Set up run configurations in the IntelliJ IDEA's IDE.
- You can also configure this server to listen on a custom port (the default port is 8080).
-Dserver.port=9090- This comes in handy when running multiple projects at once, which is very common with microservice-oriented architectures.
- Start Run/Debug in your IDE.
- The component should successfully start up with port 8080 exposed
- Check swagger-ui by clicking on http://localhost:8080/swagger/index.html
- If you require additional information about Swagger UI, check their online site.
- Swagger UI is used as a simple Swagger presentation UI.
- Any changes made in the code are automatically propagated to swagger-ui (courtesy of SpringFox).
- The same Swagger UI is used as a documentation tool. It provides also an easy way to test the functionality of your component’s API.
Docker Compose and third-party tools
Some manuals for CodeNOW work with different third-party components like Apache Kafka or Redis. The easiest way for local development is to download the publicly available Docker Compose receipts. Here is a list of examples used during the writing of this manual:
Set up run configurations in the IDE IntelliJ IDEA
There are two ways to display the run/debug configuration settings in the IntelliJ IDEA:
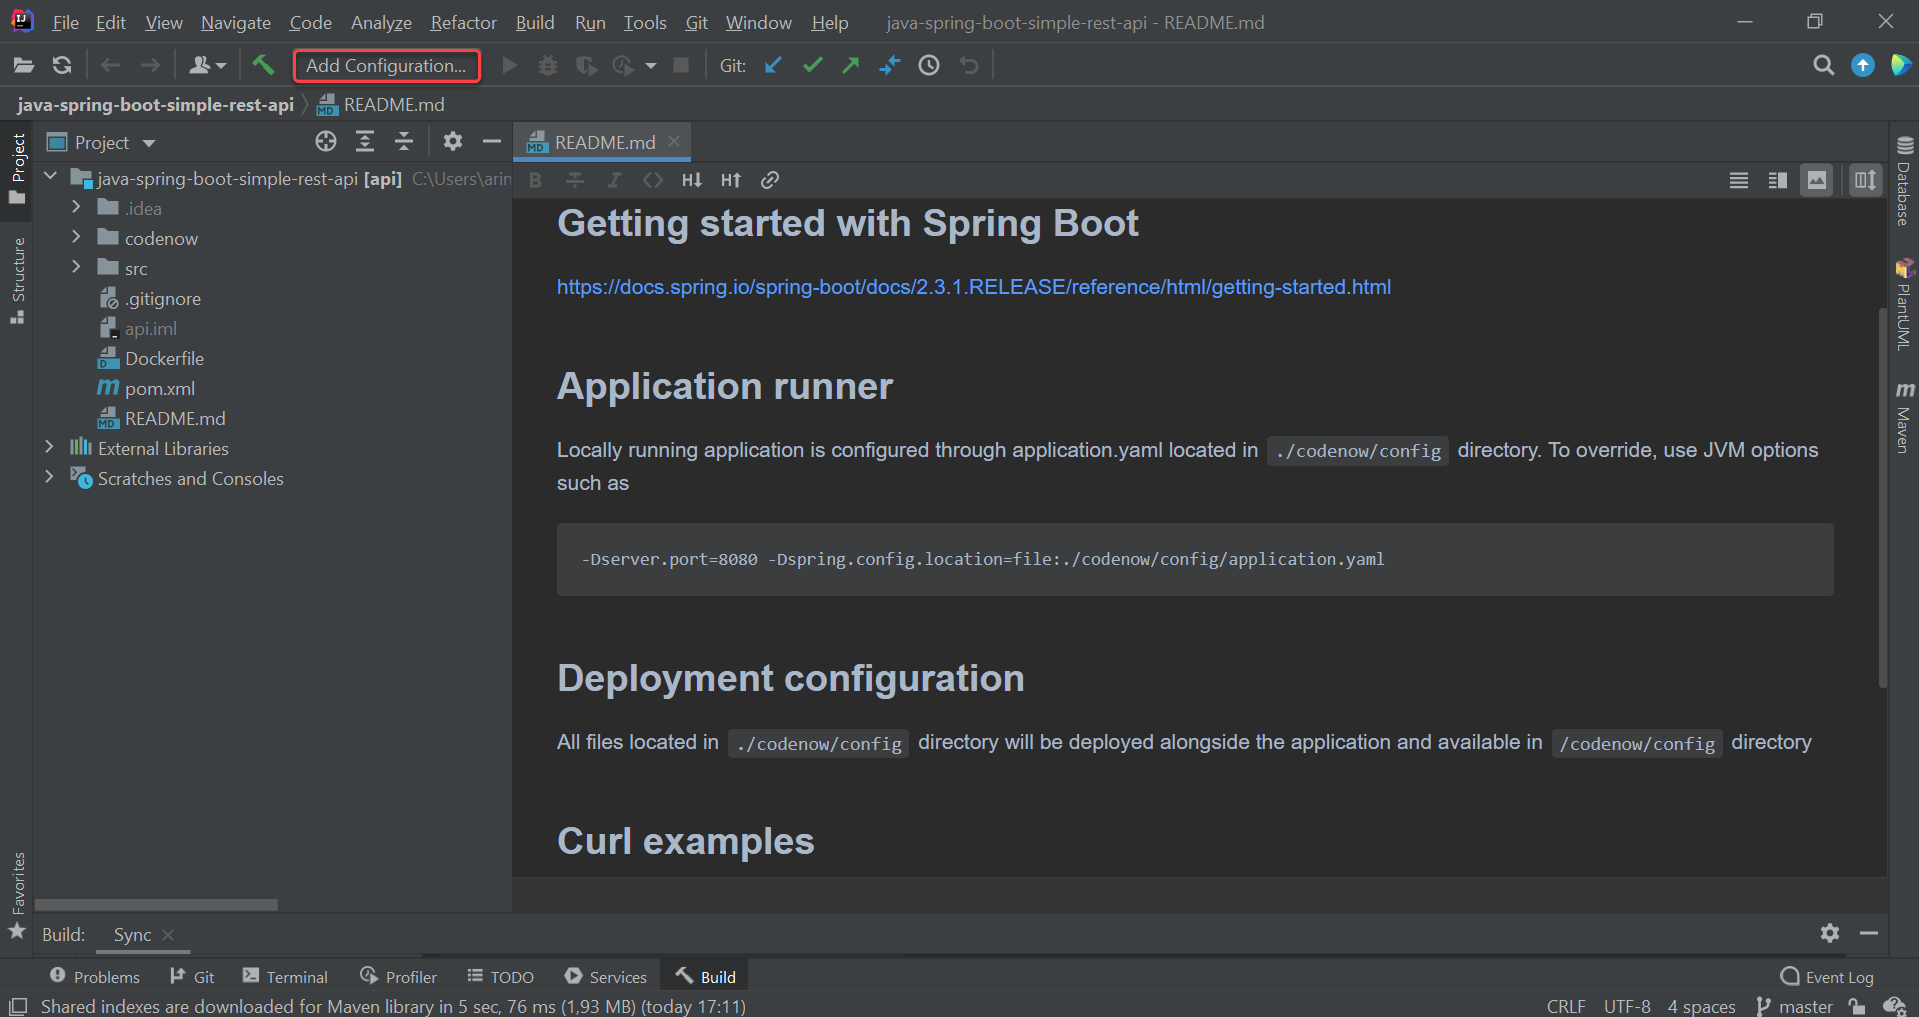
- Click on the "Add configuration" button at the top of the screen. In the version of the IntelliJ IDEA dating from 2021, the button is located in the upper-left corner. In earlier versions, it is located in the upper-right corner.

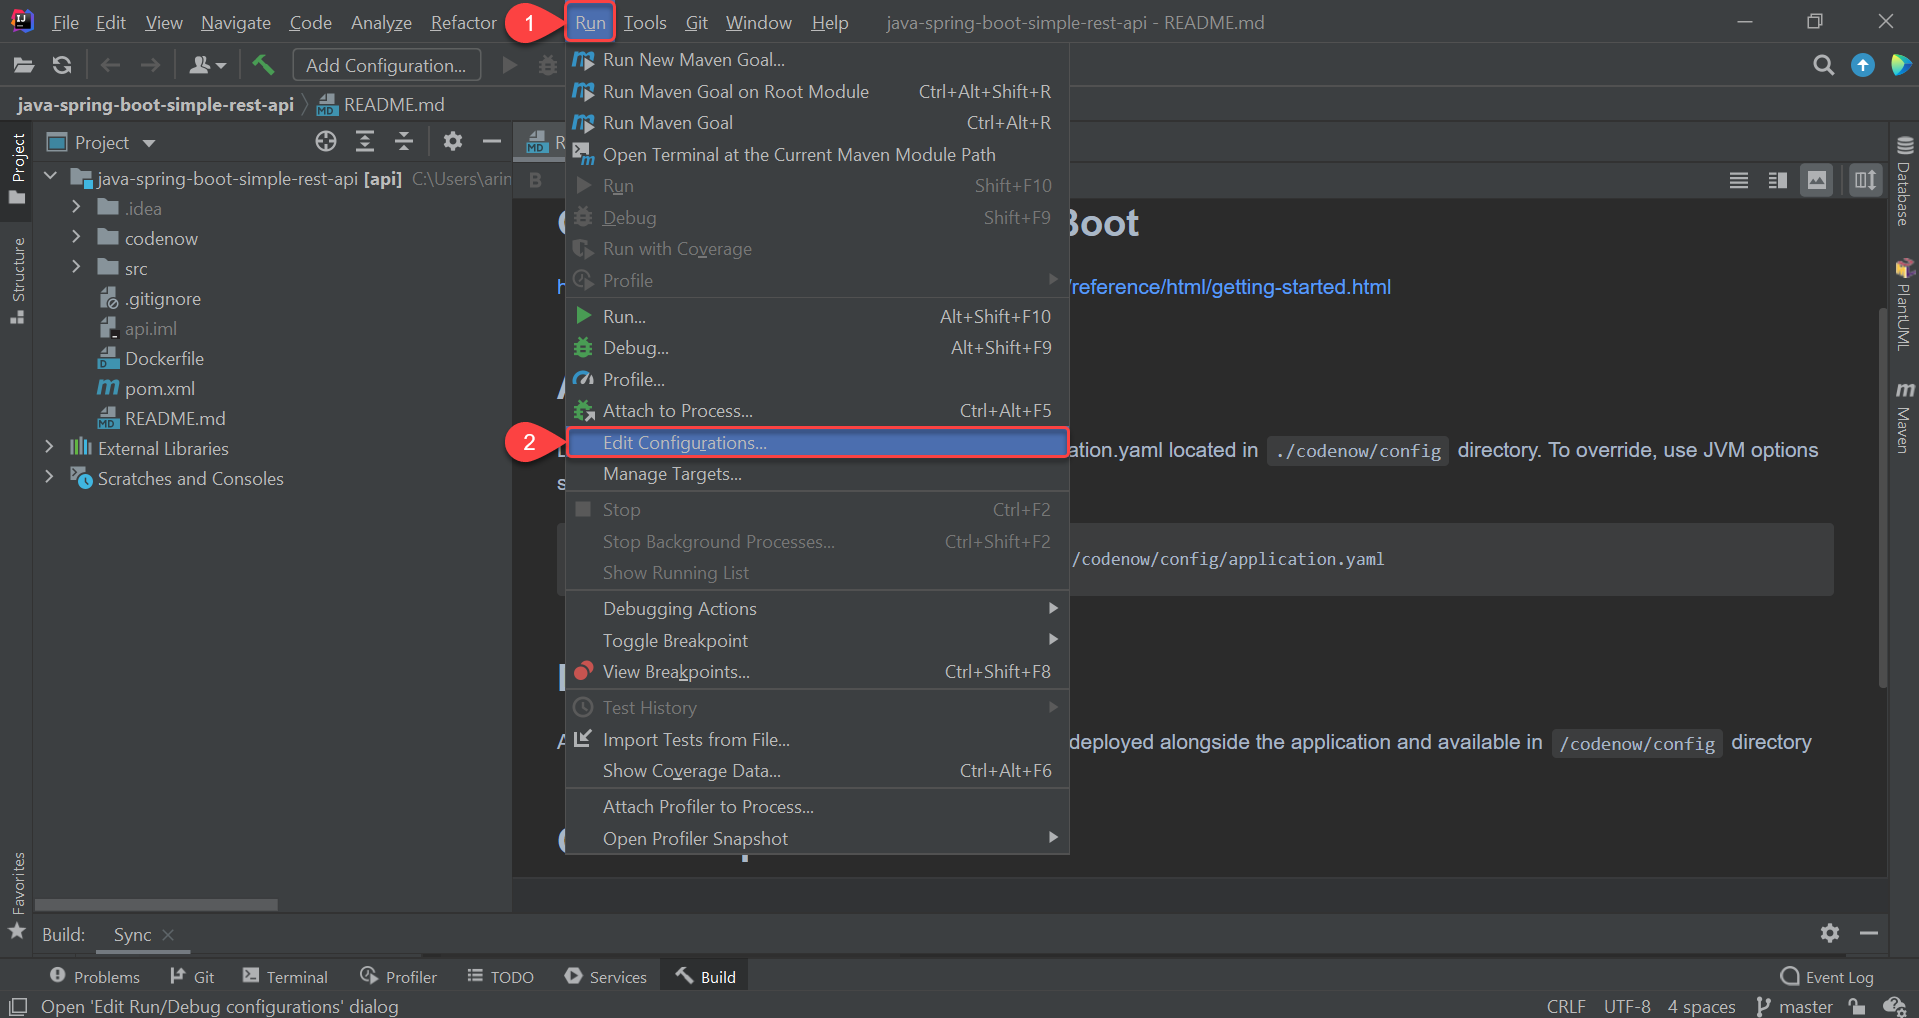
It is also possible to use the top menu by clicking on the "Run" and "Edit Configuration...".

-
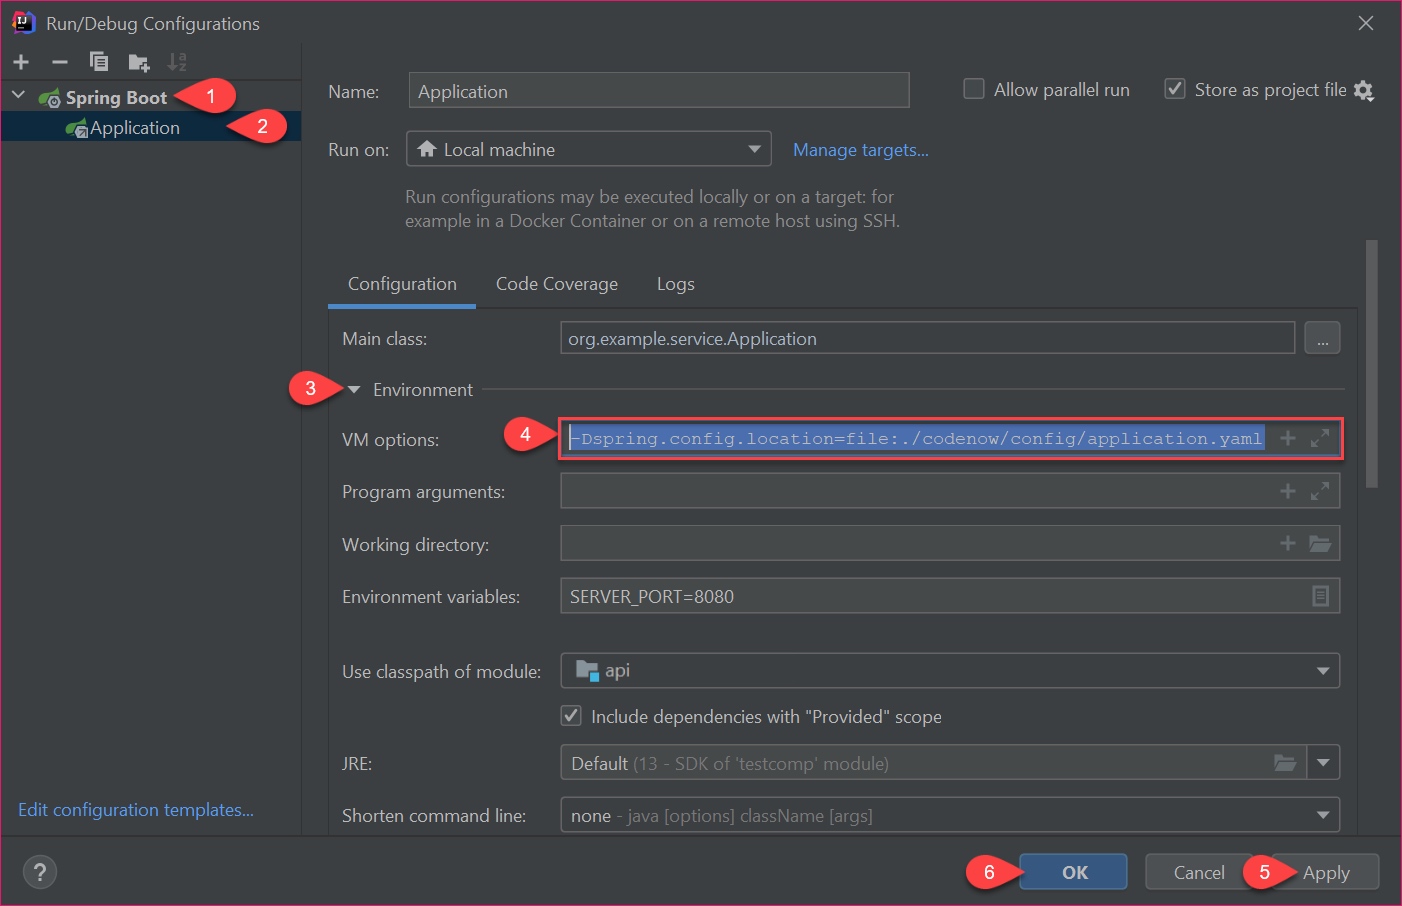
In the Run/Debug Configurations dialog, follow the steps in the picture. In the Spring Boot Application environment, set this line in the VM options:
-Dspring.config.location=file:./codenow/config/application.yaml
Then click on the "Apply" button. Confirm your changes by clicking on the "OK" button.

What's next?
See our other developer tutorials: