Application Components
What you'll learn
- How to create a new Application Component that will contain the source code for a specific part of the application logic.
What is a CodeNOW Application Component?
- Components in the Microservice architecture encapsulate a specific part of the application logic, for example user details, billing, shipping and others.
- Application Components contain the source code for the given Application in separate Git repositories.
- Components have a separate versioning scheme (Each Component is versioned by its Builds).
An application in the microservices architecture is described by the application components and their orchestration.
Application Resource in a Component
In CodeNOW, a resource is a separately managed entity that your component depends on during build, deployment, or runtime. Resources are tracked by the platform and injected into your component automatically where appropriate.
- Connected service resource: a database, message broker, cache, or other service connected to the component. These are configured through service connections and provided via environment variables and secrets.
- Configuration resource: values stored in configuration files (e.g.,
helm-values.yaml) and environment variables used to parameterize builds and deployments per environment. - Deployment resource: Helm charts that describe how the component is deployed, including replicas, CPU/memory requests/limits, and ingress.
- Domain and networking resource: ingress rules and domain mappings that expose the component publicly.
You can review and manage these resources in the Application Detail under the component’s Configuration and Connections sections. When you deploy the component, CodeNOW resolves the resources for the target environment and injects the correct values (e.g., service endpoints, credentials) into your deployment.
Prerequisites
- An existing Application, see Create a New Application.
Supported technology stacks
If you want to use external Docker images, change how an Application is deployed with Helm Charts, or your desired tech stack just isn't listed below, see Custom Templates.
Each technology stack has automatically generated configuration files.
Configuration files
Configuration files are text-based files containing settings and parameters that define the behavior of an application. They may hold crucial information such as database connections, API endpoints, feature toggles, and other variables essential for customizing an application's behavior across different environments.
In the repository of your application component, configuration files are stored in the codenow/config folder.
Default configuration files
When using CodeNOW's scaffolders, configuration files are generated automatically based on your chosen stack:
| Scaffolder | Configuration files |
|---|---|
| C#/NuGet/.NET | appsettings.json |
appsettings.Development.json | |
| Java/Gradle | startup-message.txt |
| Java/Maven/Micronaut | application.yaml |
| Java/Maven/Spring Boot | application.yaml |
| Java/Maven | startup-message.txt |
| JavaScript/npm/React | runtime-configuration.js |
| JavaScript/npm/Storybook for React | runtime-configuration.js |
| PHP/Composer | myconfig |
Custom configuration files
Every file contained in the codenow/config folder is considered a configuration file.
Therefore, you can create custom configuration files on top of the default ones.
CodeNOW recognizes 2 special configuration files located in codenow/config:
Helm-values.yaml- the Helm Chart values fileenvironment-variables
Create a new Component
- Go to the Application Detail of the Application you want to create a Component for and click on Choose Action -> Create New Component (or Create Component under Components section)
- Choose a Name for the Application Component, optionally modify Technical name or add Description
- Technical name is an identificator that will be used internally by CodeNOW
- It is automatically generated and must be truncated to 30 characters (because of Kubernetes labels)
- Technical name is an identificator that will be used internally by CodeNOW
- If you want to import an existing git repository instead of creating a new one, see Import an existing git repository
- Choose a supported technology stack (Language|Build Tool|Framework) that you want to use
- Java and PHP only: edit the package name under Starter Configuration.
- If you want to connect a Managed Service (eg. a database, messaging service or authentication service) to your Component, click Add New Connection, name your connection and select the type of the service
- For more information, see Connect Service to Component
- Click Create Component
- Set up your Local Environment by doing the following:
- Make sure you have SSH set up
- Clone your repository by running the given command, click on Next
- Follow the given instructions in order to set up your local environment correctly
- Instructions may vary depending on the stack you've chosen
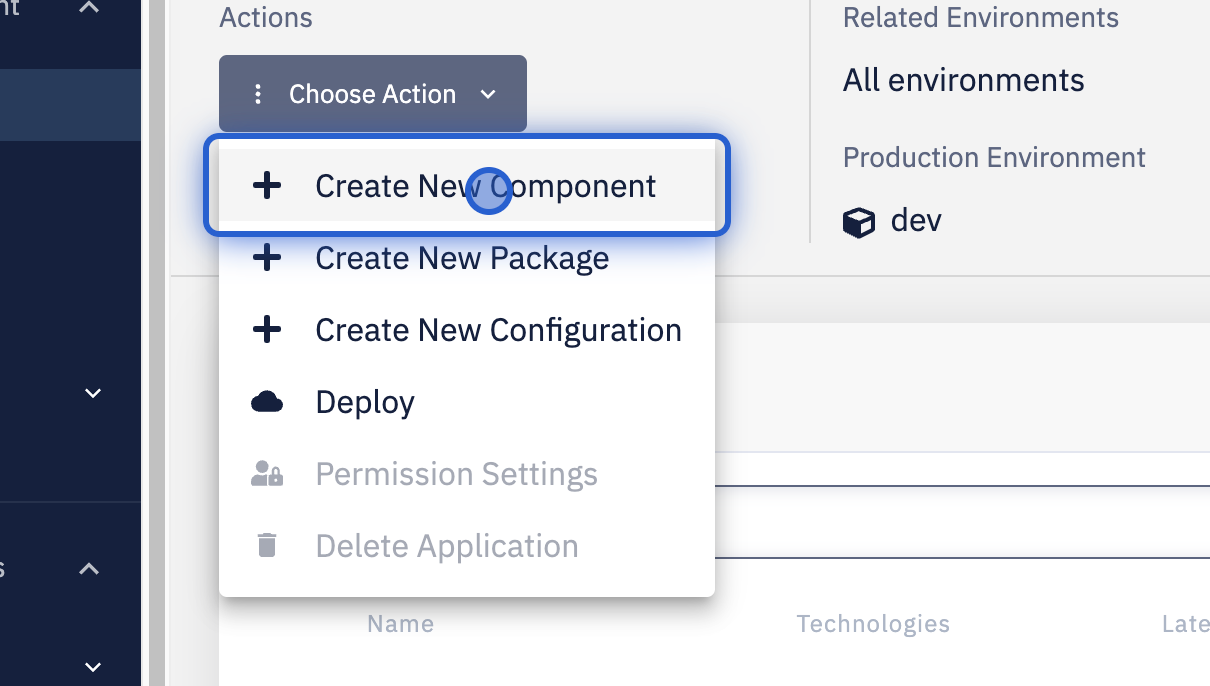
Click on Create New Component
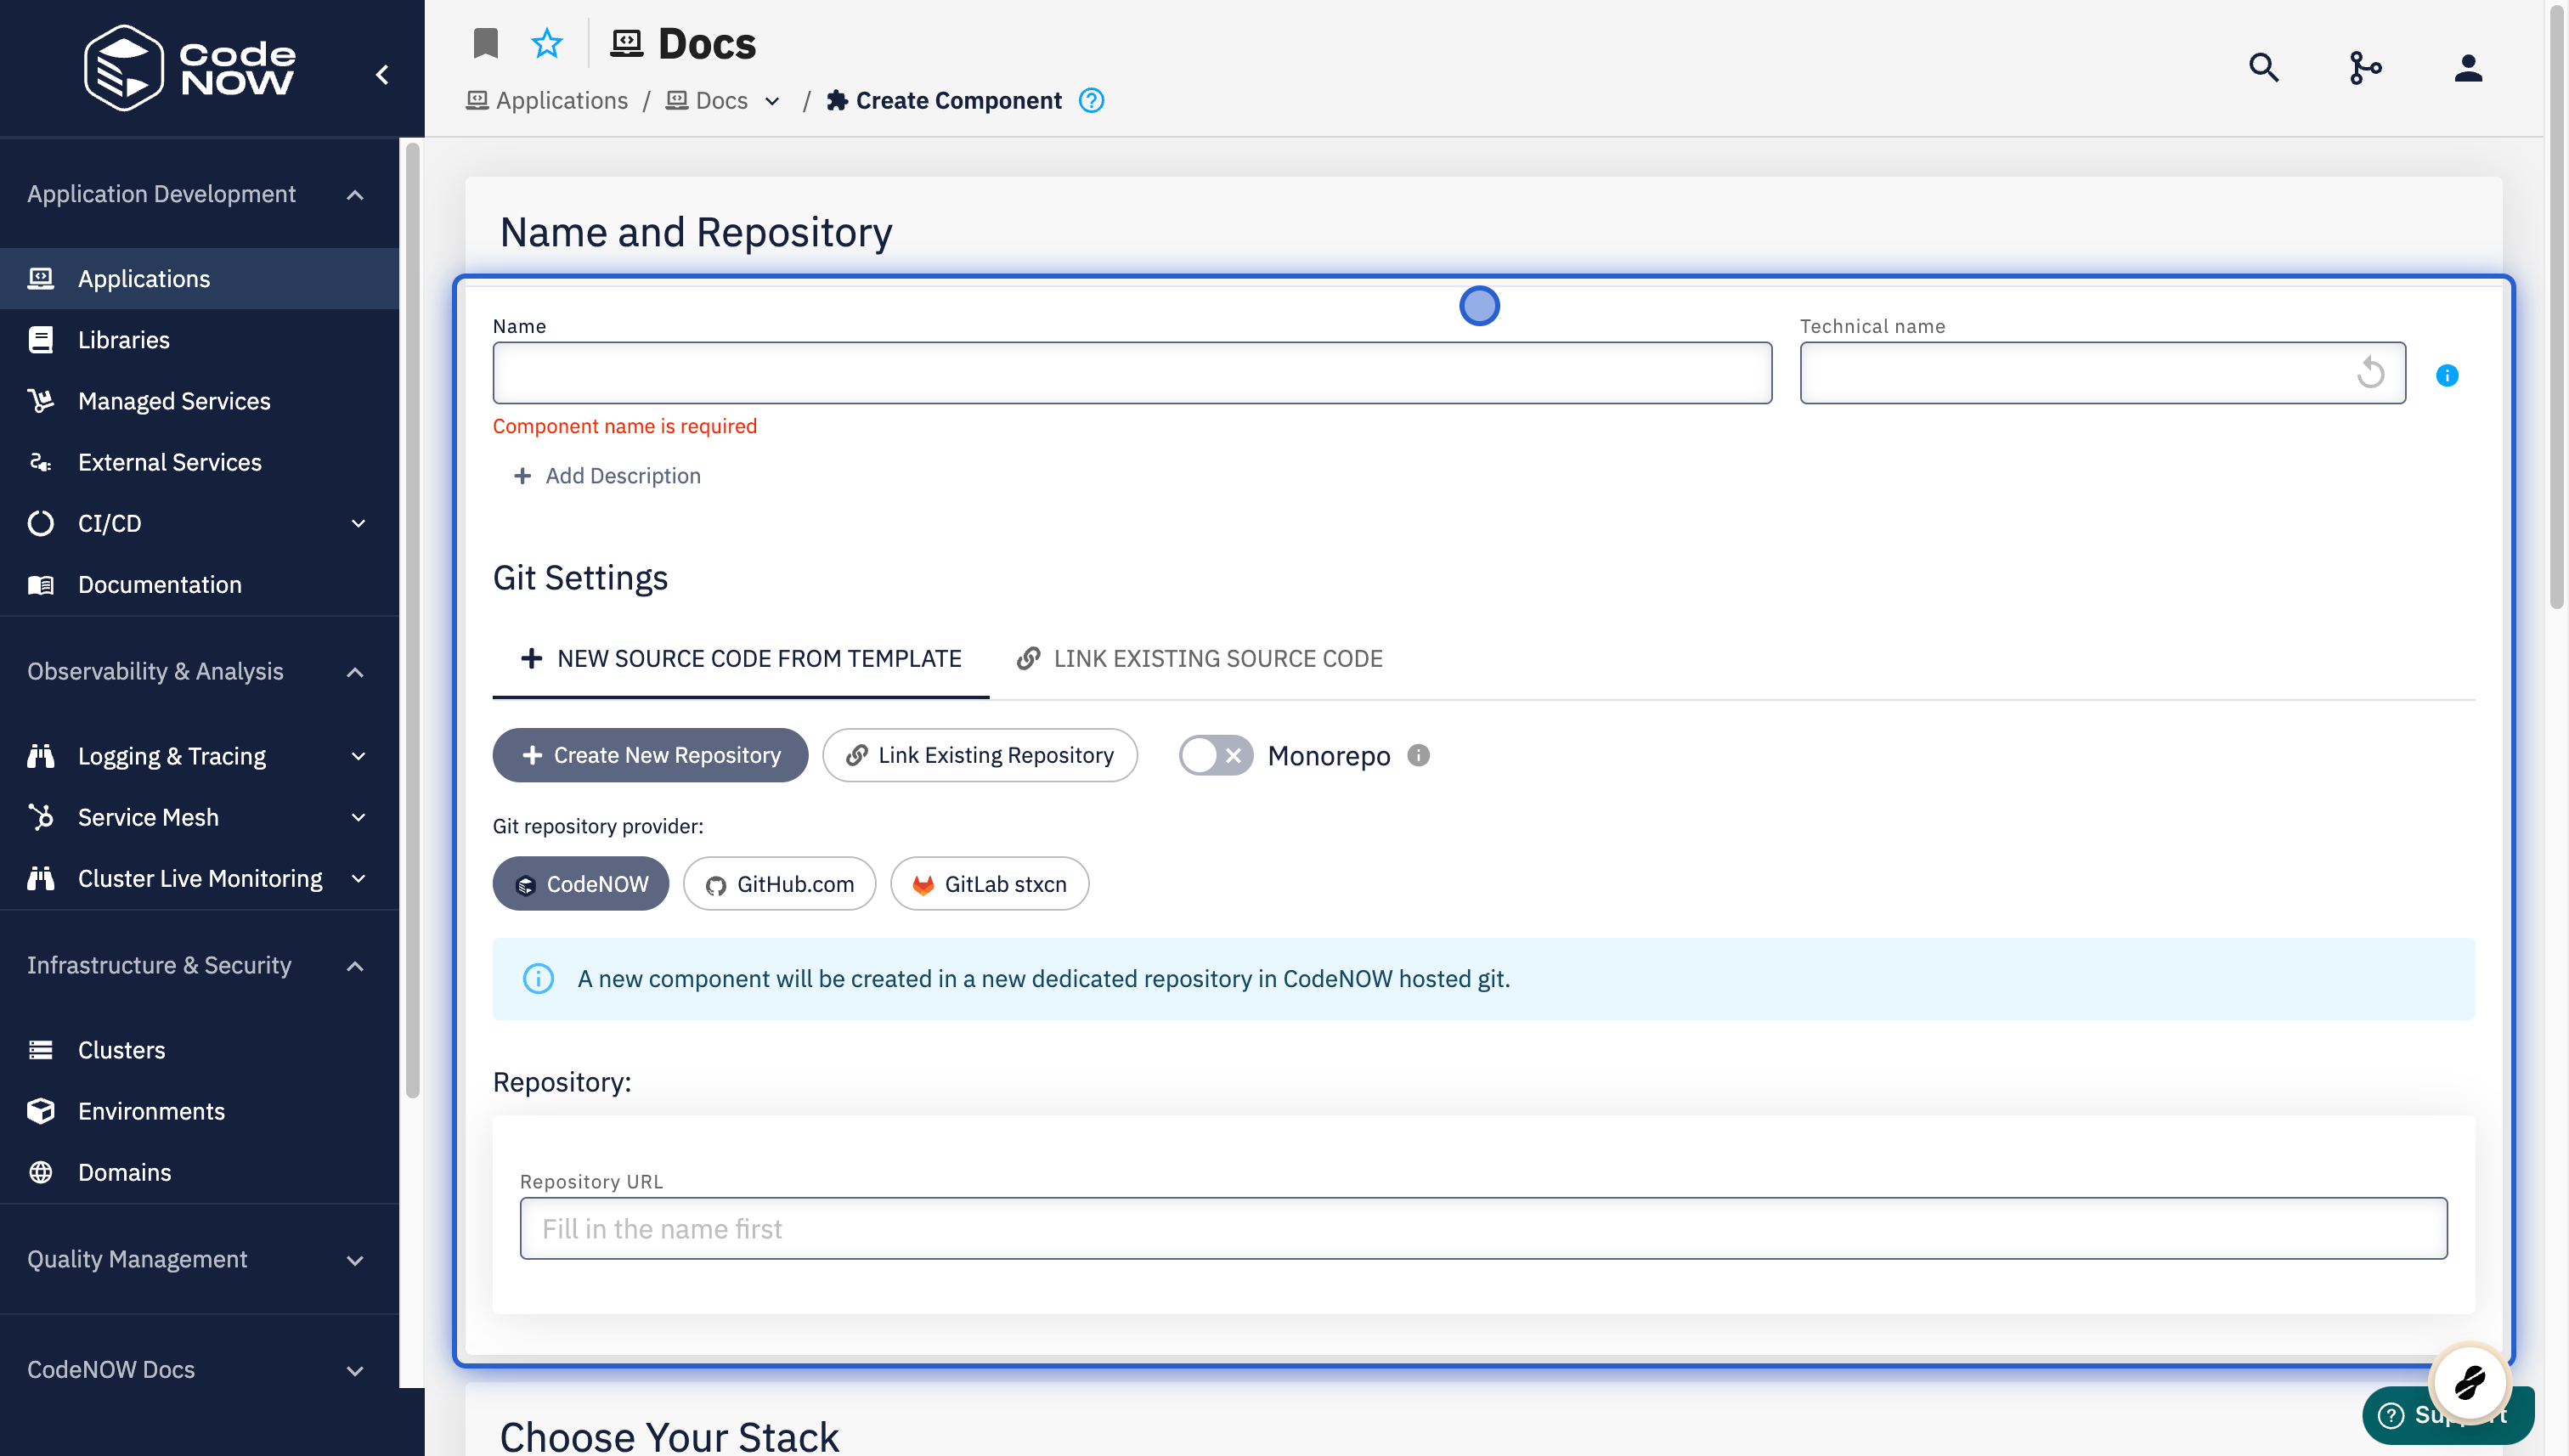
Name your Component
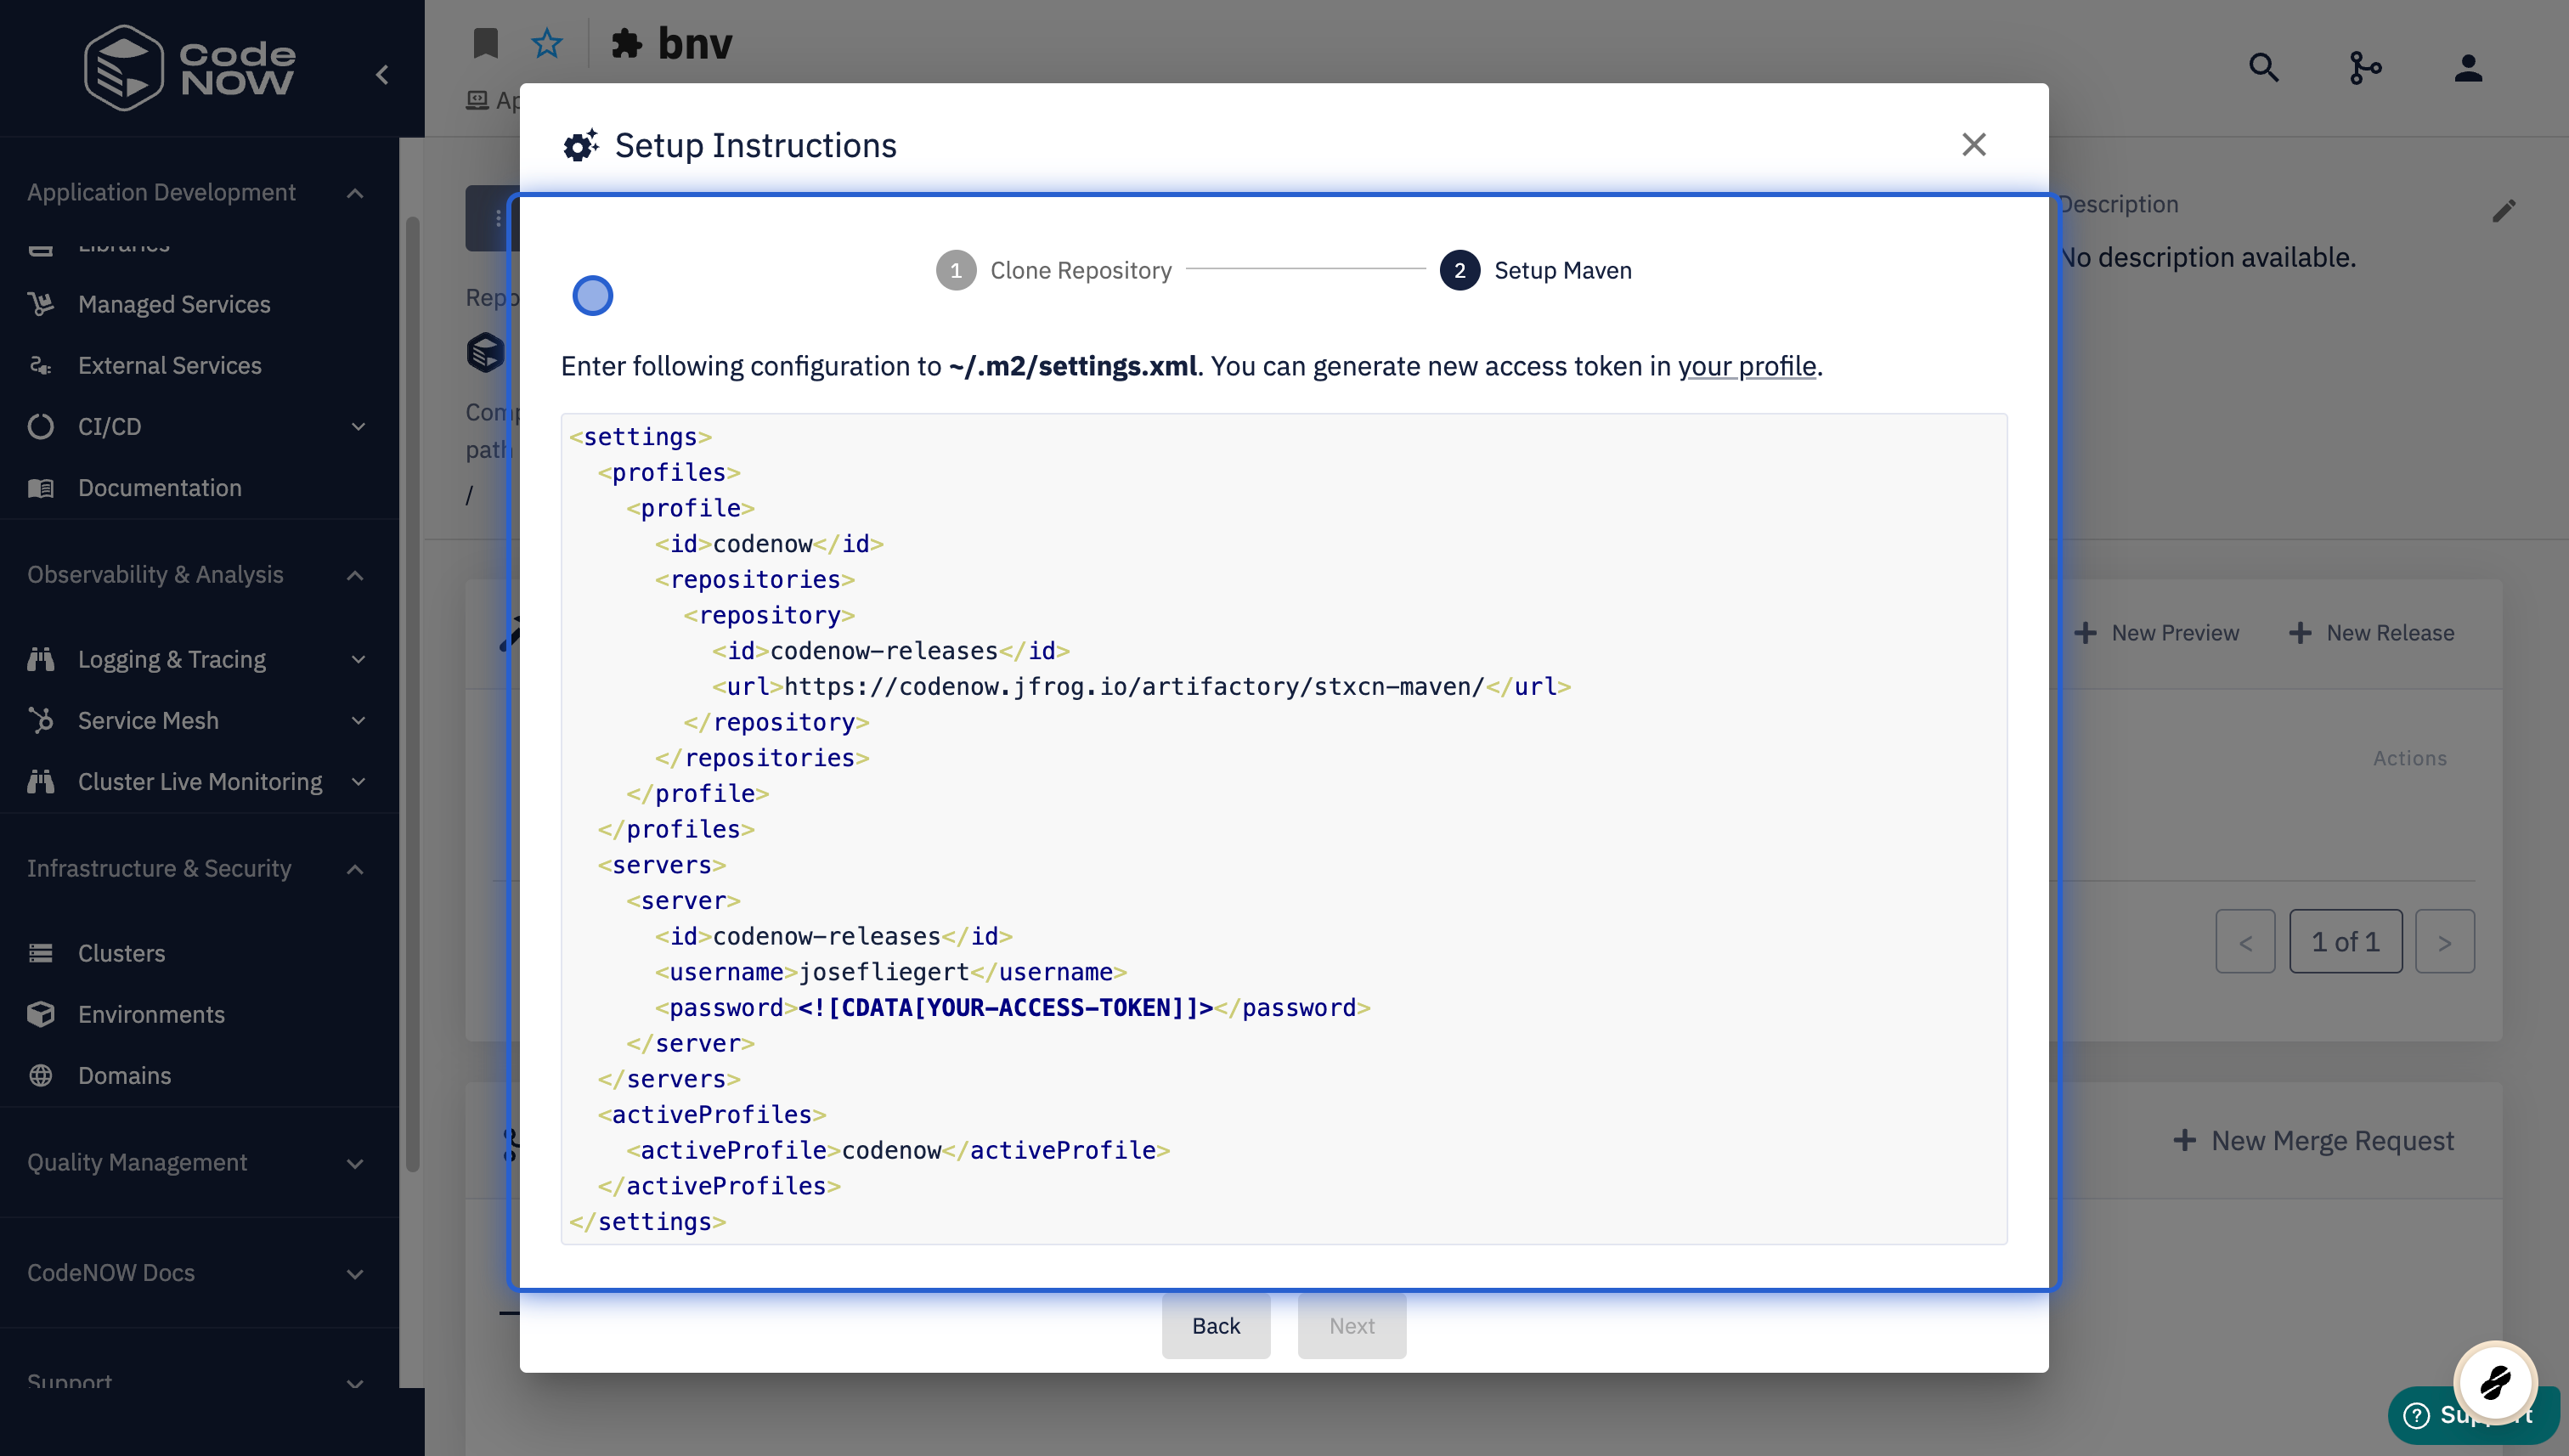
Set up local environment
Import an existing git repository
CodeNOW currently supports importing repositories from GitHub.
While creating a new Component, do the following:
-
Click on Existing git repository under Git settings.
-
If this is your first time importing a repository from GitHub.
- Click on Authorize GitHub.
- Log in to your GitHub account.
- Choose which repositories will be accessed by CodeNOW.
noteAll repositories to which CodeNOW already has access and on which your currently authorized account is a Collaborator will be automatically available to import.
-
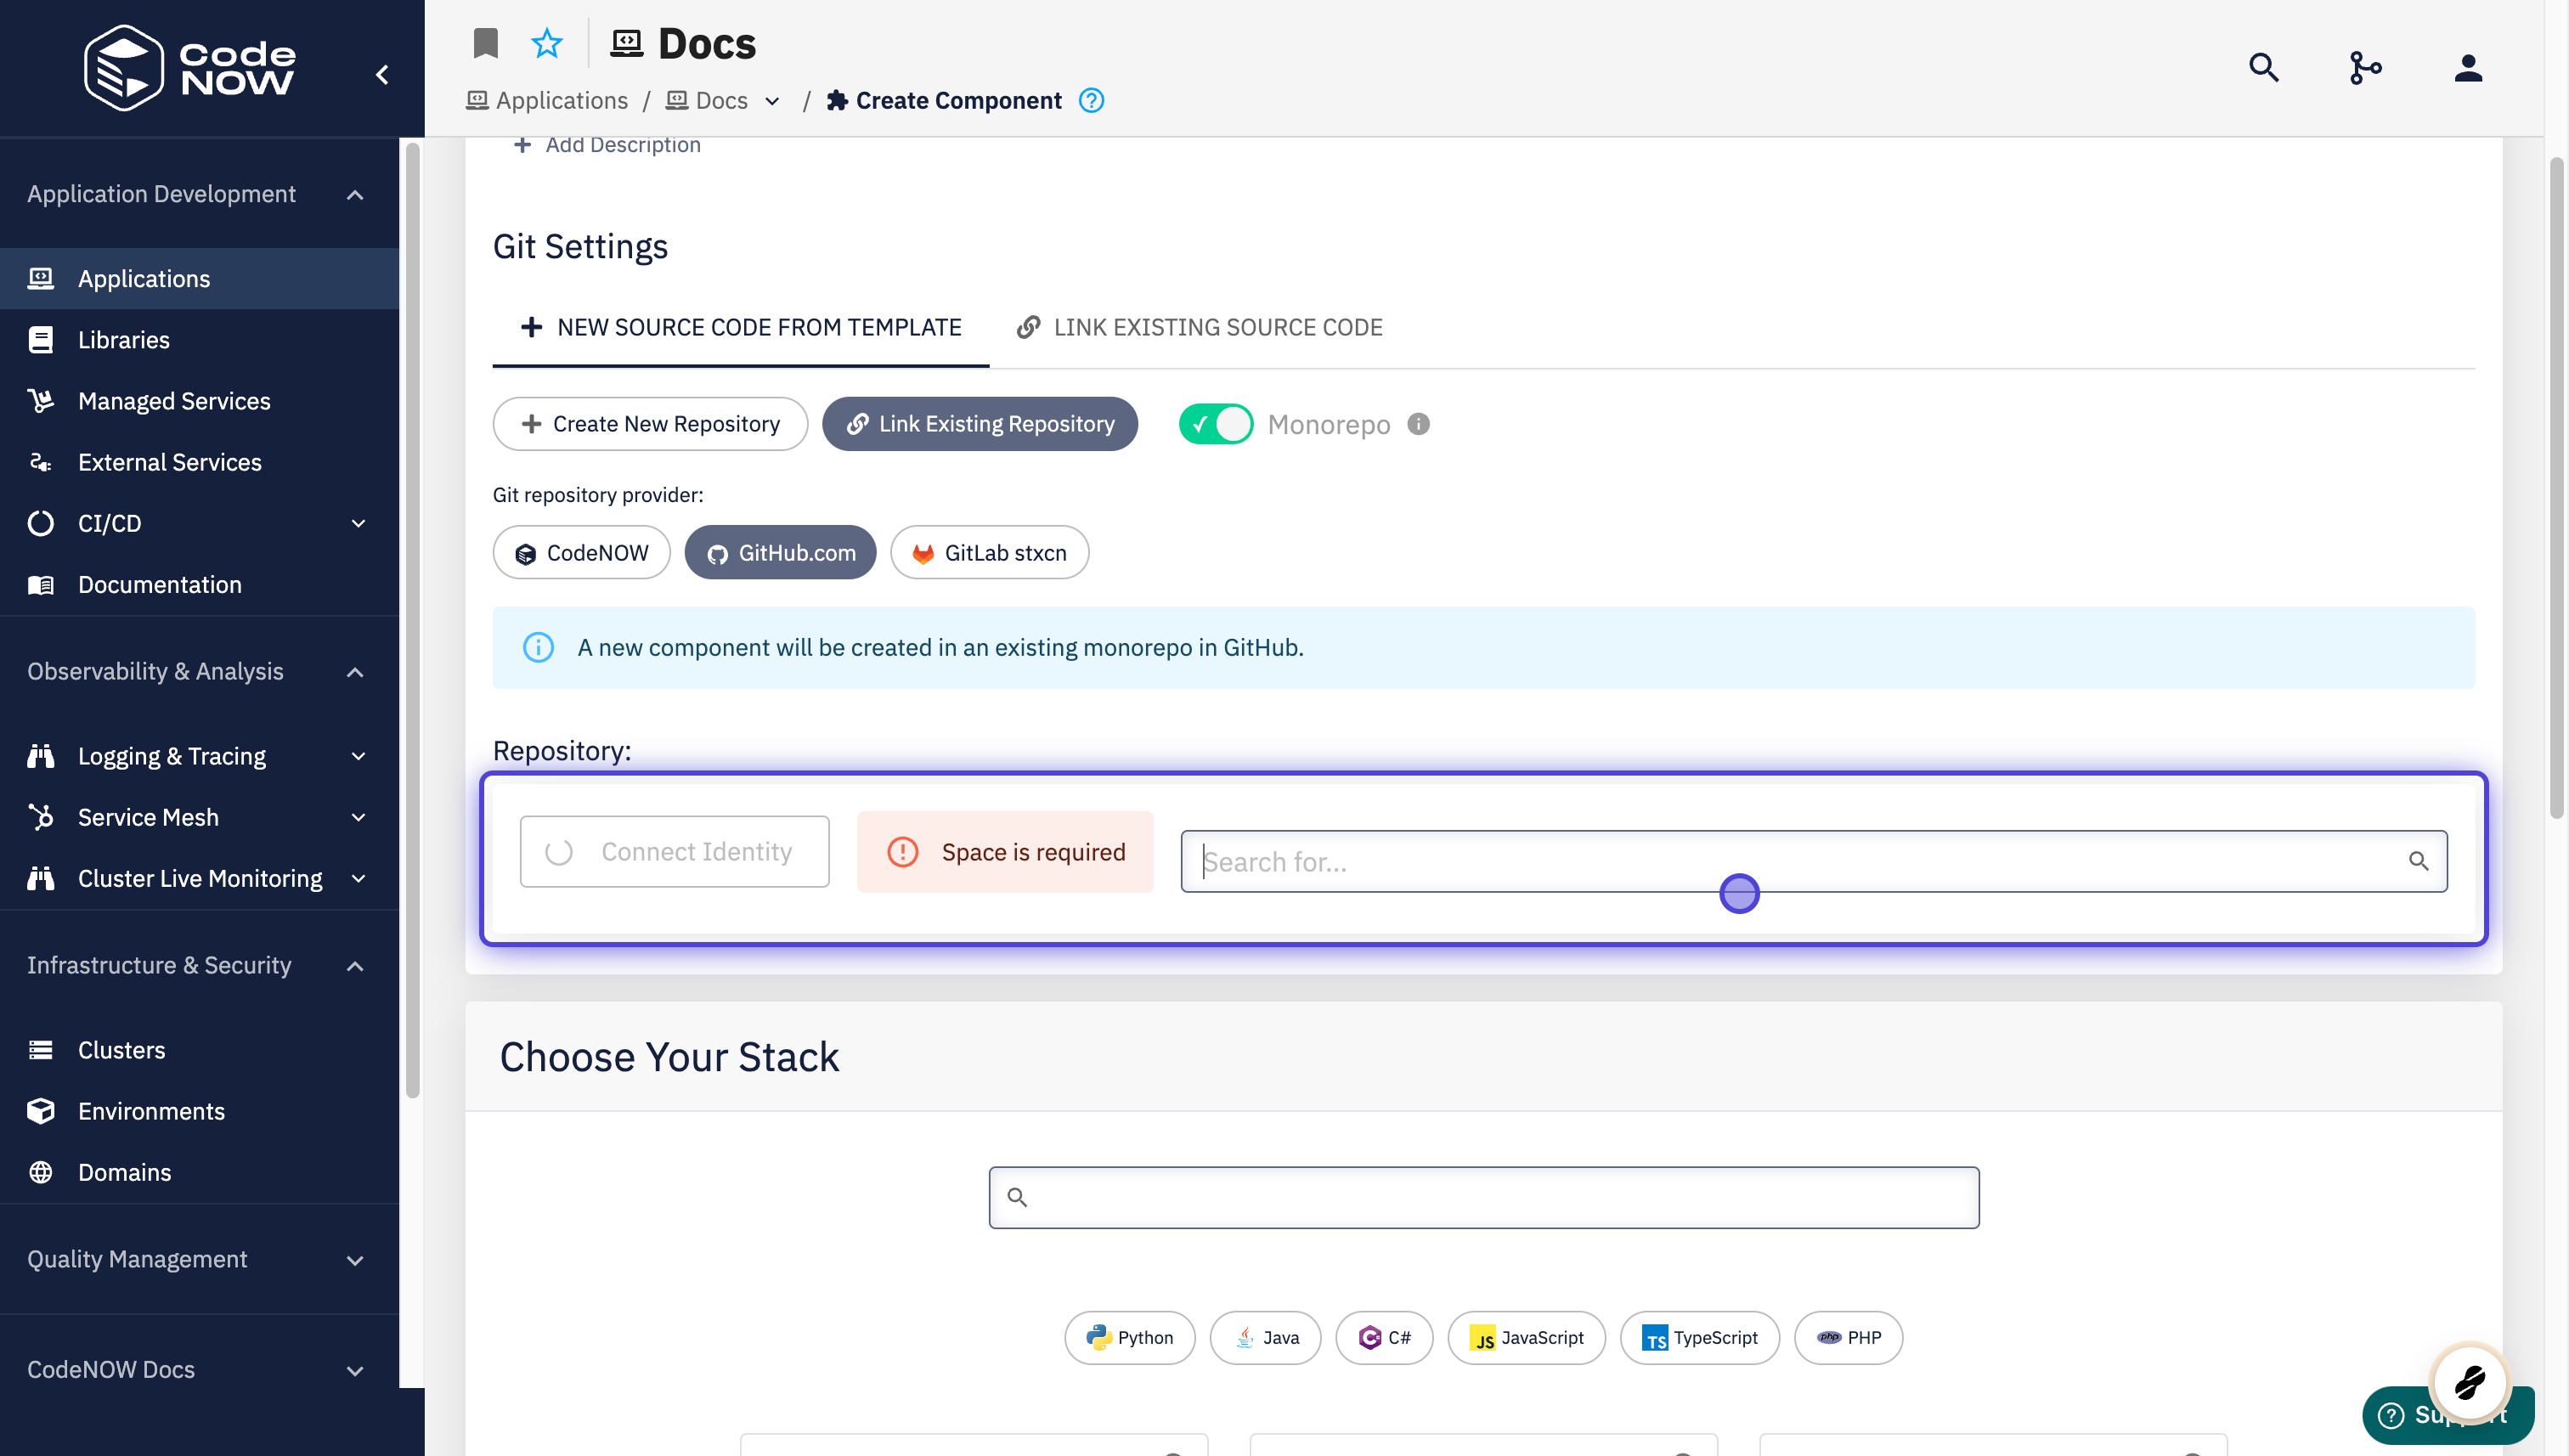
Choose the repository you want to import.
- you can edit your CodeNOW preferences in GitHub by clicking ⚙️
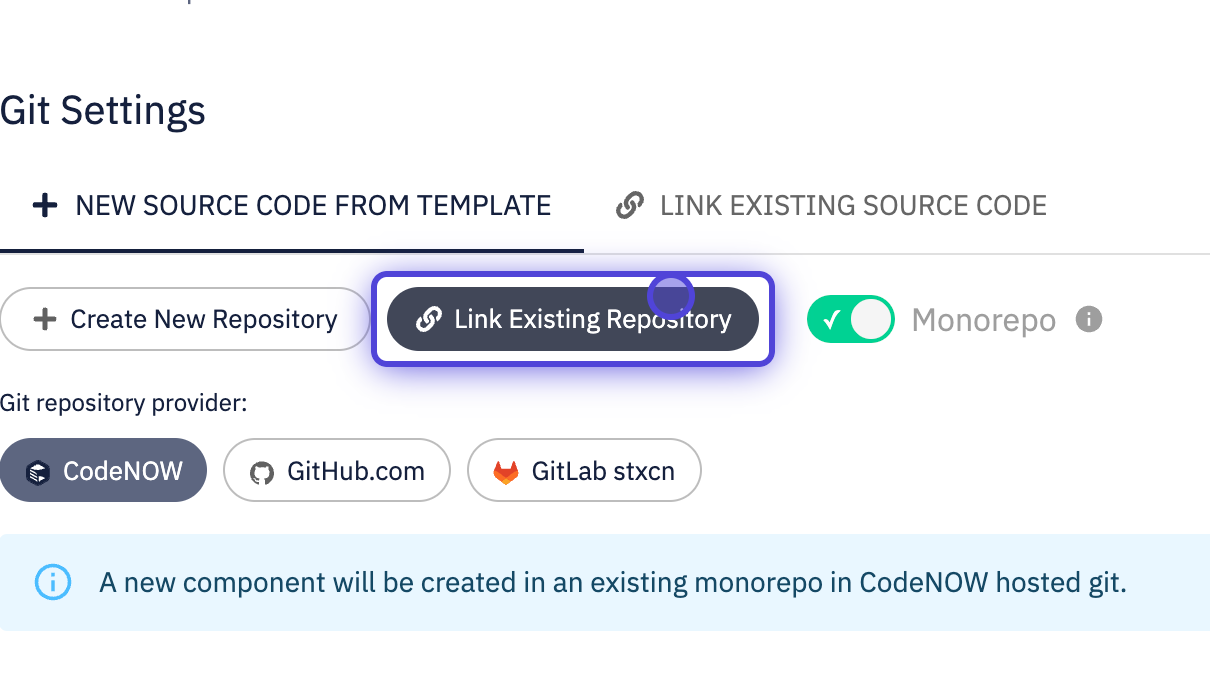
Select link existing repos.
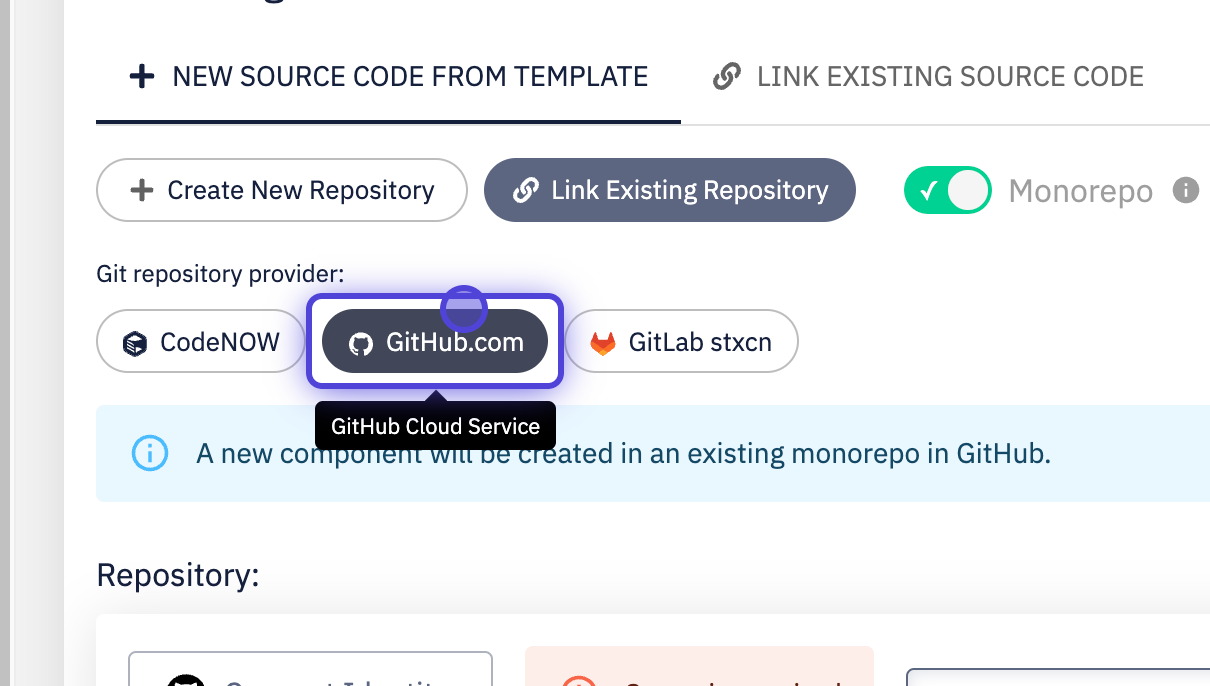
Select GitHub.
Select repository that will be imported