Custom theme for Keycloak
This article describes how to add a custom theme to the Keycloak managed service in CodeNOW.
Prerequisites
info
In order to create a Keycloak theme, follow the official tutorial. Properties that you can change, can be found here. Ready-made demo theme for CodeNOW is available on gitlab.
Steps
1. Set up an application for the theme
- Create a new application.
- Create docker-generic component.
- Create a new folder named
themein the root directory of your project. The folder has to be in the same location as yourDockerfile. - Add your custom themes into the
themedirectory.
caution
Keycloak supports creating several custom theme types (e.g. account, login...). The directory for each type should be placed directly in your theme folder, with no sub-folders.
- Replace the code in your
Dockerfilewith the sample below:- It will take the content of the
themedirectory and copy it to the filesystem of the docker container (in the directory/custom).
- It will take the content of the
FROM busybox
COPY theme /custom
- Push the changes and build the component.
- After a successful build create a new application package.
2. Configure Keycloak
caution
After making changes to an existing theme, consider clearing the cache of your browser. Otherwise, your theme might not load properly.
- Copy link to access the docker image.
- Go to the detail of your Keycloak managed service.
- Scroll down to
Configurationand do the following:- Enable the custom theme.
- Paste the copied docker image into the
Custom theme imagetext field. - Click on
Submit.
- After the pod is reloaded with the new theme (
Status=Ready), click on the Admin Panel and login to the Administration Console. - Go to
Realm settings -> Themesand select thecustomtheme option. Submit your changes by clickingSave.
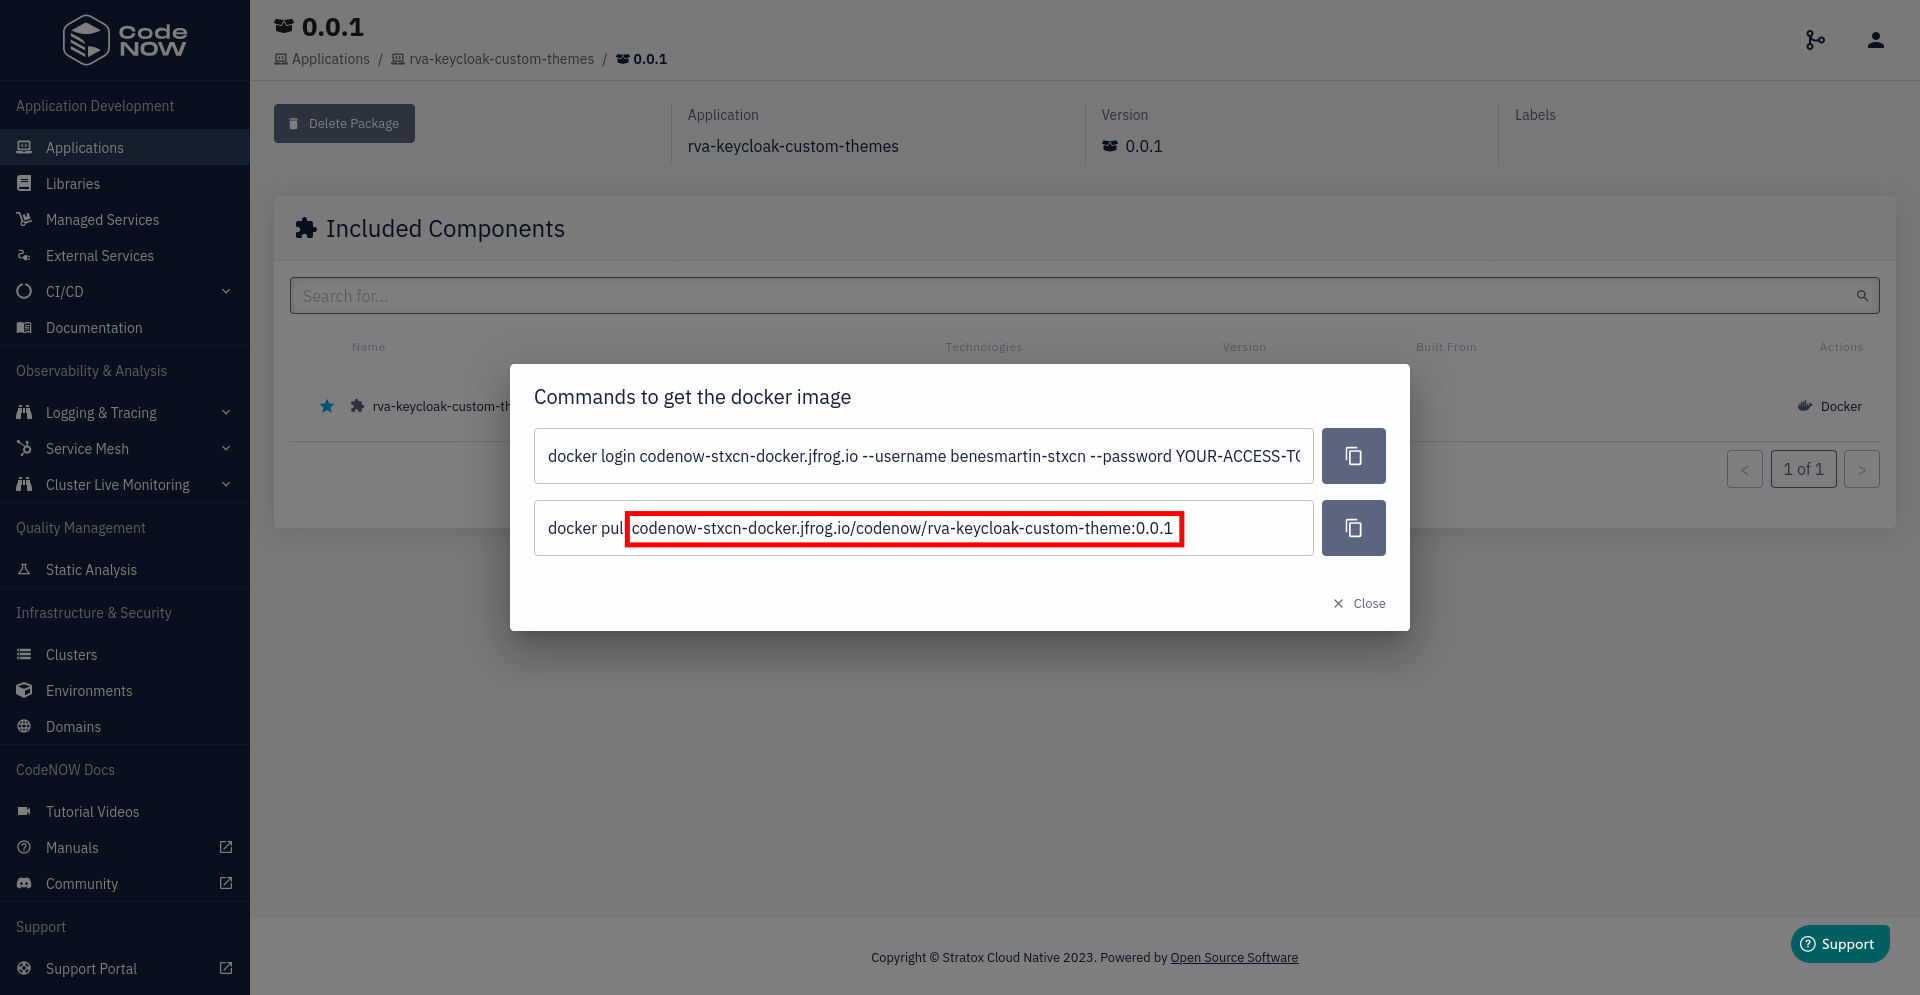
Copy your docker image
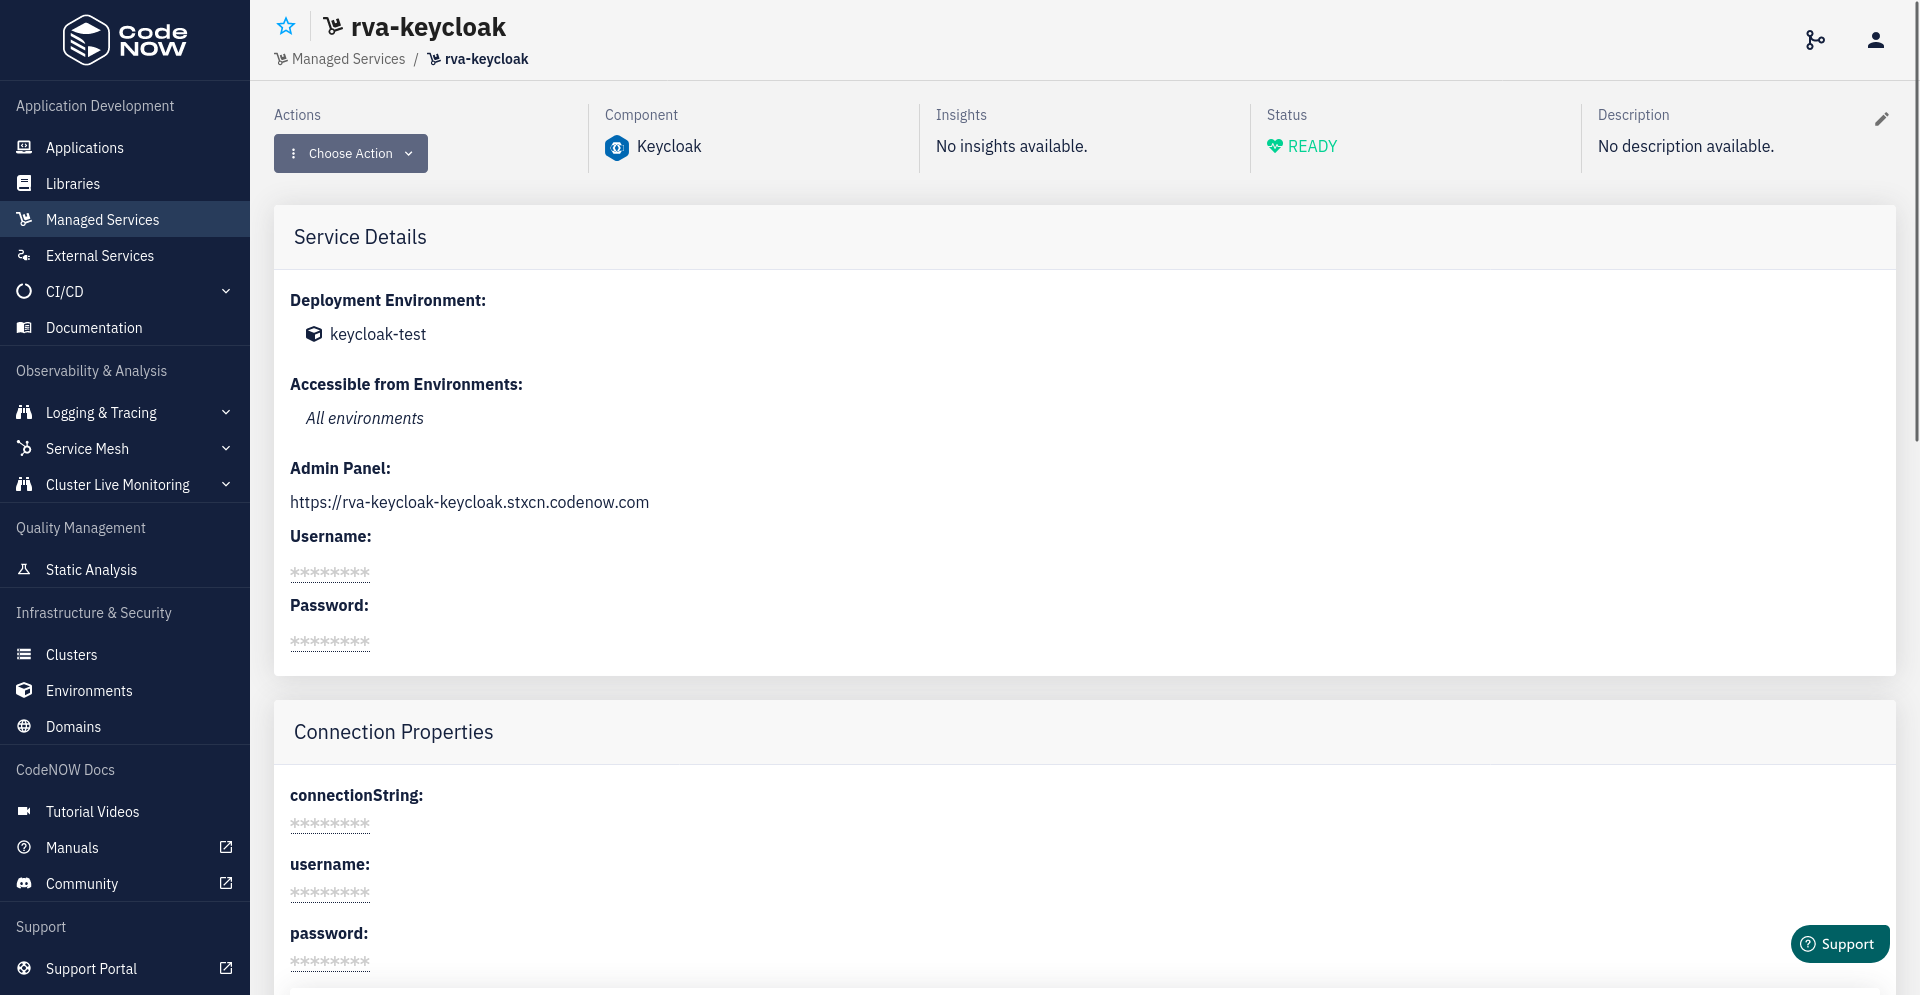
Go to the detail of your Keycloak managed service
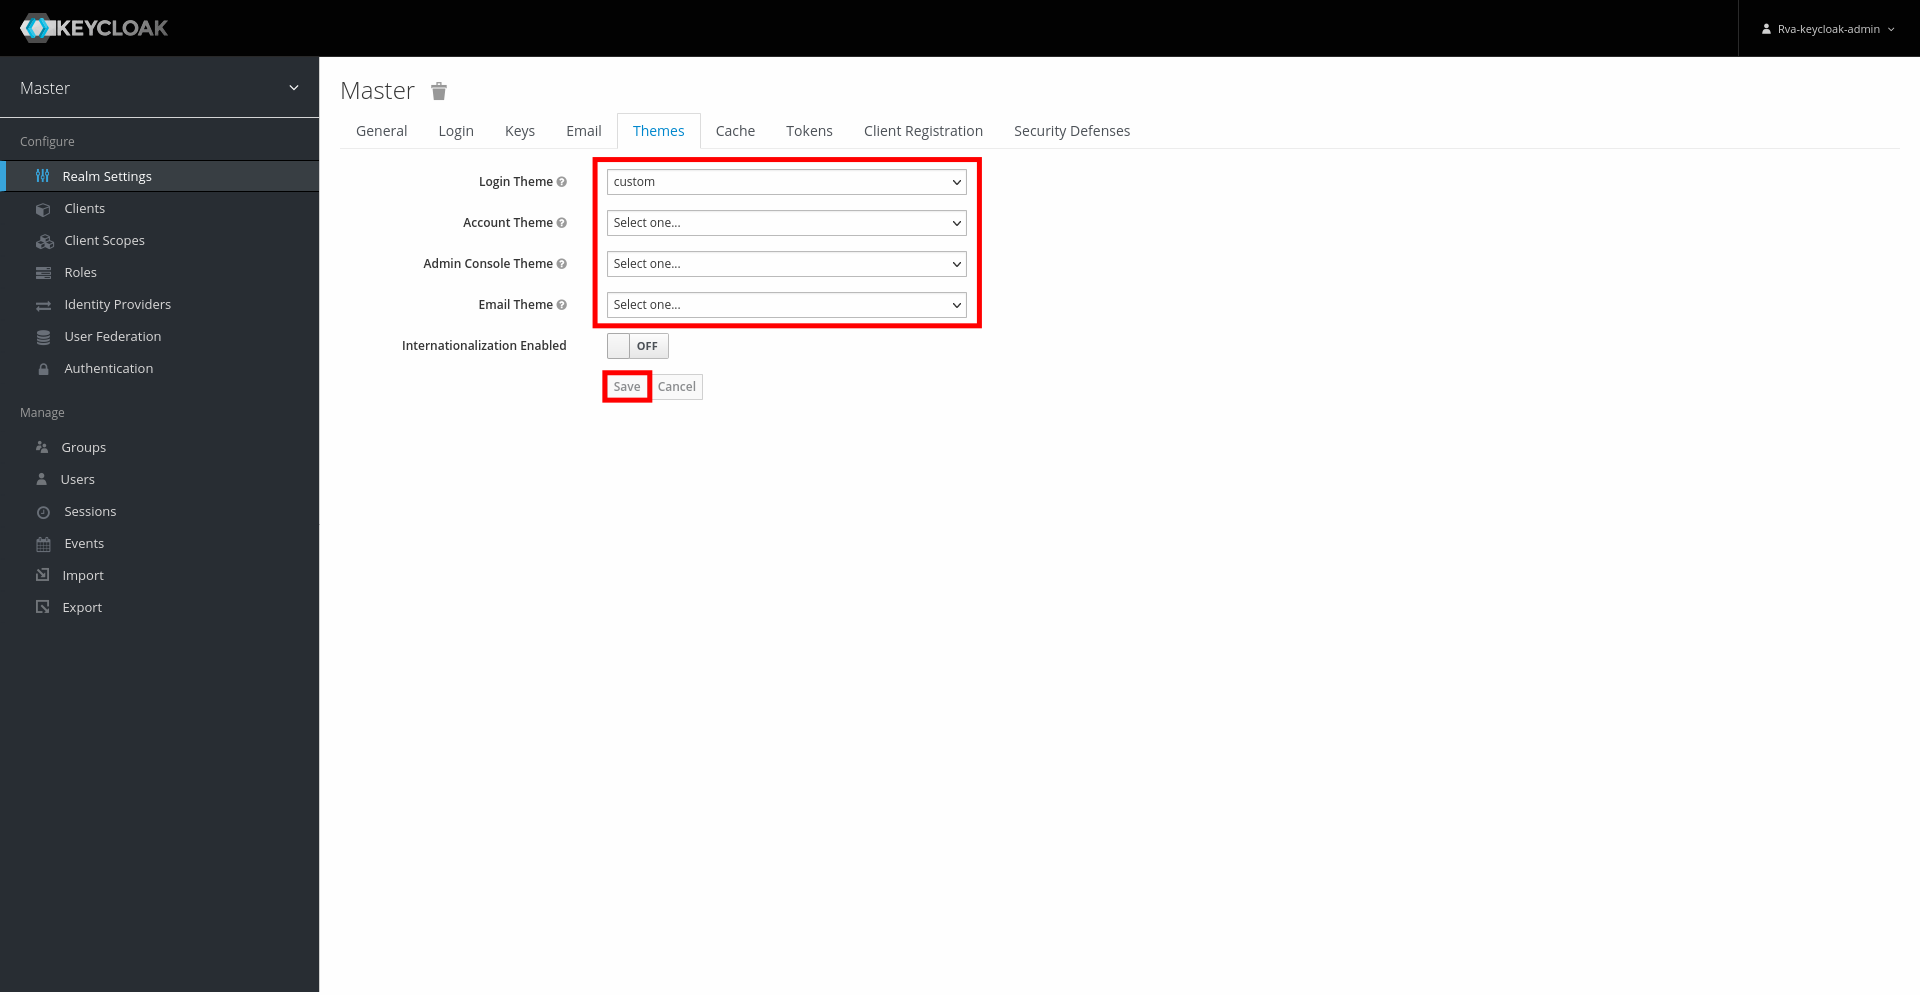
Select your theme in Admin Console
1 / 5