Create Configuration
Open the agent swarm detail and select Choose Action › Create New Configuration (or + Create Configuration in the Deployment Configurations card).
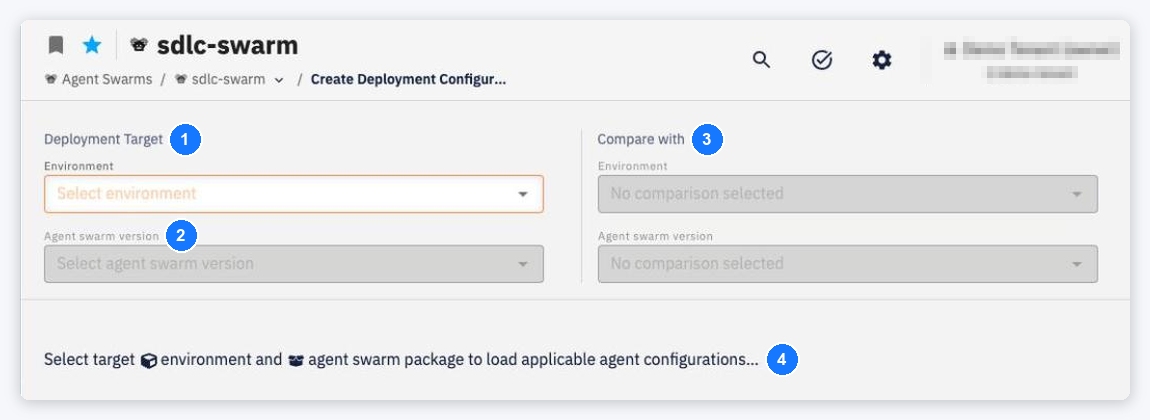
- Deployment Target › Environment — the target environment.
- Agent swarm version — the package version that starts the new interval.
- Compare with — optionally load another configuration (Environment and Agent swarm version) side by side; see Compare with.
- Until the target and version are chosen, the page shows Select target environment and agent swarm package to load applicable agent configurations... — then every agent of the package is listed (Agent Name) with its configuration tabs.
How the values are pre-populated — the first configuration from the agent defaults, a split interval from the existing configuration, a new last interval from the previous one — is the same as for applications; see Create Configuration.
Click Confirm — Configuration was saved successfully. You can now proceed to deployment.
Configuration Sections
Each agent exposes four tabs:
| Tab | Description |
|---|---|
| AGENT CONFIGURATION | Service account, admin-console access, A2A endpoint and A2A connections (opened first) |
| CONFIGURATION FILES | Override the agent's configuration files |
| RUNTIME CONFIGURATION | Instance count and CPU / memory |
| CONNECTED SERVICES | Assign service instances to the agent's bindings |