Create, Build, Configure and Deploy - Certification 1
What you’ll learn
- How to create applications, components and environments.
- How to build a component, how to configure and deploy an application to a chosen environment.
Prerequisites
- CodeNOW account (probably on Playground).
- Knowledge of What is Software Factory as a Service?.
Introduction
- CodeNOW DOCS is available on docs.codenow.com.
- Ask our support team for help. Use the
Supportbutton in the CodeNOW.
Task 1 - Create an Environment
- Create environment named
<dev>-<YourLastName>, for example:dev-Smith. - Create environment named
<test>-<YourLastName>, for example:test-Smith.
- Q: What is a deployment environment (for example:
DEV/TEST/UAT/PROD)?- A: for example: https://en.wikipedia.org/wiki/Deployment_environment
- Q: What is a cluster in the CodeNOW terminology?
- A: A cluster defines which cloud provider (Digital Ocean/AWS-Amazon/Azure-Microsoft/Private Cloud) will be used for managed Kubernetes.
- Q: How to create a new cluster?
- A: You cannot create a new cluster. Processes are configured by product support. So if you need to configure a new Kubernetes cluster, please come to us. Contact our support team and we can configure a new cluster for you.
- Q: How to manage a cluster?
- A: In fact, there is not a lot you can manage within the cluster, or at least not on your own. You can manage basic resources which are utilized by the cluster, like the number of CPUs memory storage, but you cannot do it on your own. Those parameters are configured by Stratox support. So if you need to change your infrastructure configuration of the cluster, please contact us and we will do it for you. For more information, visit Cluster management.
- Q: What is Kubernetes?
- Q: What is Docker?
- A: for example:
- Q: What is an equivalent of a CodeNOW environment in Kubernetes?
- A: A Kubernetes Namespace.
- Q: What is DevOps?
- A1: DevOps is a set of practices that combines software development (Dev) and IT operations (Ops). It aims to shorten the systems development life cycle and provide continuous delivery with high software quality. [Loukides, Mike (7 June 2012). "What is DevOps?". O'Reilly Media.
- A2: What is DevOps? REALLY understand it (YT 35 min)
Task 2 - Create an Application
- Create application named
testapp-<YourLastName>(for example:testapp-Smith). Set production environment setup tonone.
- Q: What is an Application in the CodeNOW platform?
- A1: An Application consists of one or more components. Each component represents a microservice.
- A2: An Application in the microservice architecture is described by application components and their orchestration.
Task 3 - Create a Component
- Create a Front-end Component
- Name:
frontend-component-<YourLastName>, for example:frontend-component-Smith - Stack: JavaScript, NPM and React
- Name:
- Create an API Component
- Name:
api-component-<YourLastName>, for example:api-component-Smith. - Stack: C# v9, Nuget, and .NET
- Name:
- Q: What is a Component?
- An application in the microservices architecture is described by the application components and their orchestration.
- Components (microservices) encapsulate specific application logic (i.e. user details, billing, shipping, etc.).
- Application components have release cycles and separate Git repositories!
- Q: Where you can find Git repo address? Which credentials should I use?
Task 4 - Build a Component
-
Build the
frontend-component-<YourLastName>Release Build, version1.0.0
-
Build the
api-component-<YourLastName>Release Build, version1.0.0
-
Create a new Git branch
buildFailTestin theapi-component-<YourLastName>Git repository. -
Insert several random strings to
Api.Component.<YourLastName>/Controllers/HelloWorldController.csfile in thebuildFailTestbranch. This should cause a failed build. -
Commit the changes into the
buildFailTest branch. -
Build a new version of the
api-component-<YourLastName>from the branchbuildFailTest- Use
Release Buildand create a version1.0.1 - Build should fail due to changes done in step 4. If the build does not fail, repeat the steps 4-6 until the build fails.
- Use
-
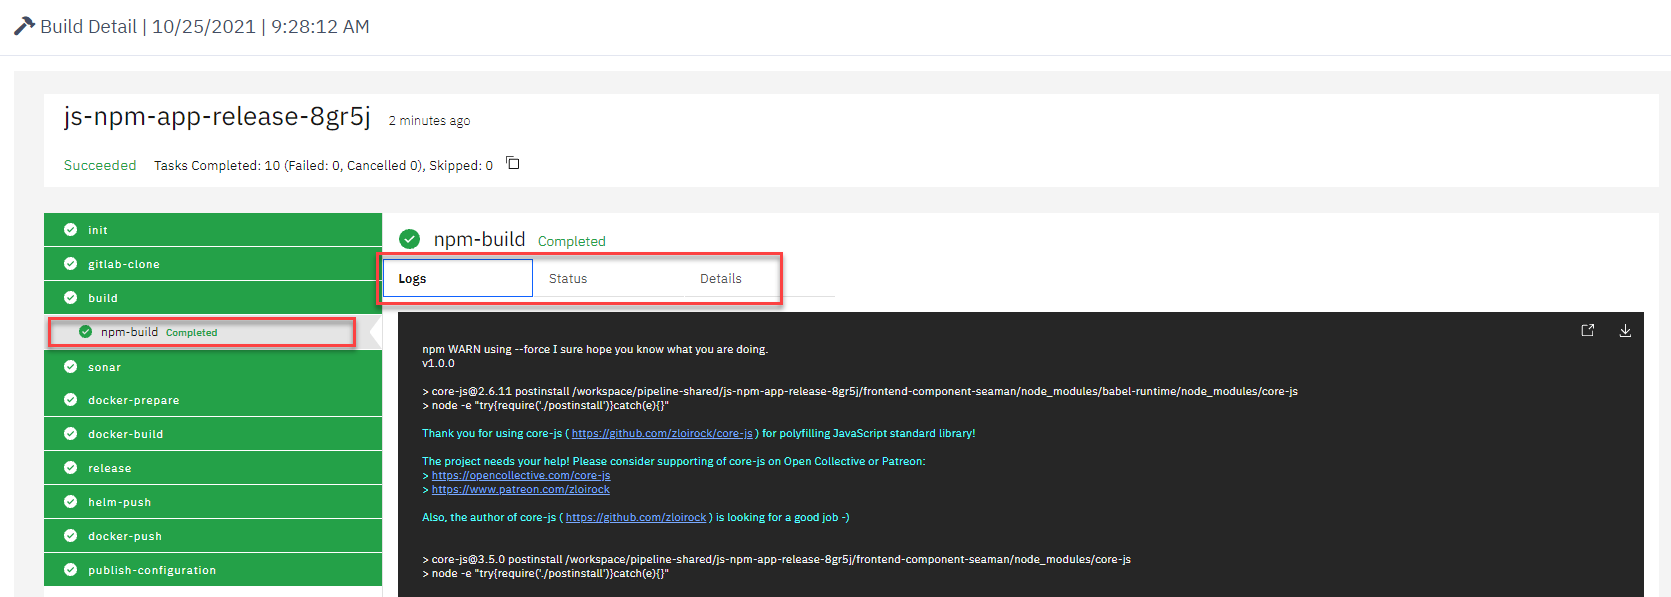
Find the details about the failed build (and create a screen capture for a later check).
- Q: How are software versions numbered ?
- Q: What is the difference between a Preview and a Release build?
- Q: What is the main reason for using a Preview build?
- Q: SonarQube: What is it?
- A1: SonarQube is a universal tool for static code analysis that has become more or less the industry standard. Keeping code clean, simple, and easy to read is also a lot easier with SonarQube. [Sonarqube: What it is and why to use it?]
- A2: See CodeNOW tutorial.
- Q: What is a Static Analysis?
- A: Static analysis, also called static code analysis, is a method of computer program debugging that is done by examining the code without executing the program. The process provides an understanding of the code structure and can help ensure that the code adheres to industry standards. Static analysis is used in software engineering by software development and quality assurance teams. Automated tools can assist programmers and developers in carrying out static analysis. The software will scan all code in a project to check for vulnerabilities while validating the code.. [By Alexander S. Gillis]
- Q: What is a CI/CD pipeline?
- A: A CI/CD pipeline automates your software delivery process. The pipeline builds code, runs tests (CI), and safely deploys a new version of the application (CD). Automated pipelines remove manual errors, provide standardized feedback loops to developers, and enable fast product iterations...[Marko Anastasov]
- Q: Where I can find the details about CI/CD pipelines in CodeNOW?
- Q: You get an error message The build has failed.. Where can you find the details about the error?
- A: Build detail -> build (in CI/CD pipeline)
- Q: What is Git?
- A: Git is a software for tracking changes in any set of files, usually used for coordinating work among programmers collaboratively developing source code during software development. Its goals include speed, data integrity, and support for distributed,... [Wikipedia]
- Q: How to create a new Git branch in GitLab?
- Q: What does a Tag in Git context mean?
- A: A tag is used in Git contexts for marking a specific version. Alternatively, tags are used to mark specific points in the history as important or to mark release points. Once a tag is set, it is usually not moved after that.
- Q: Can the customer change the CI/CD pipeline? (for example: skip the SonarQube analysis in the release build)
- A: Yes, individually for each component in the component detail. (Do it only if you really know what are you doing.)
Task 5 - Create an Application Package
-
Create an Application Package version 1.0.0
-
Include
api-component-<YourLastName>andfrontend-component-<YourLastName>, both in version 1.0.0. -
Add a red Label NonPROD
-
Add a green Label
<YourLastName>FirstAppPackageLabel
- Q: What is an Application Package?
- A: See tutorial.
- Q: What is the purpose of Application Package Labels?
- A: To enable user to set a custom colored notes for a specific Application Package Version. (e.g. NON-PROD , UI-IMPROVEMENTS, LOGING-BUG-FIX, ...)
Task 6 - Create Deployment Configurations
-
Create a Deployment Configuration for the application
testapp-<YourLastName>and thedev-<YourLastName>Environment- Use the
testapp-<YourLastName>-1.0.0Application Package - Edit the
frontend-component-<YourLastName>configuration file runtime-configuration.js: - Set the HELLO_TARGET parameter to
<YourLastName>. This application instance is deployed in the DEV environment. For example: - HELLO_TARGET:
Smith. This application instance is deployed in the DEV environment. - NOTE: If you cannot find the runtime-configuration.js, check if you used the correct stack (JavaScript, NPM and React) for the component.
- Use the
-
Create a Deployment Configuration for the application
testapp-<YourLastName>and thetest-<YourLastName> Environment- Use the
testapp-<YourLastName>-1.0.0Application Package - Edit the
frontend-component-<YourLastName>configuration file runtime-configuration.js: - Set the HELLO_TARGET parameter to
<YourLastName>. This application instance is deployed in the TEST environment. For example: - HELLO_TARGET:
Smith. This application instance is deployed in the TEST environment. - NOTE: If you cannot find the runtime-configuration.js, check if you used the correct stack (JavaScript, NPM and React) for the component.
- Use the
Task 7 - Deploy an Application
-
Deploy the
testapp-<YourLastName>-1.0.0in thedev-<YourLastName>andtest-<YourLastName>Environment with the Deployment configurations created in step 6. The Deployment configuration will be selected automatically according to the selected Environment when initializing the Deployment.- Leave other configuration (
Assigned domains, and others) unchanged and deploy the application.
- Leave other configuration (
-
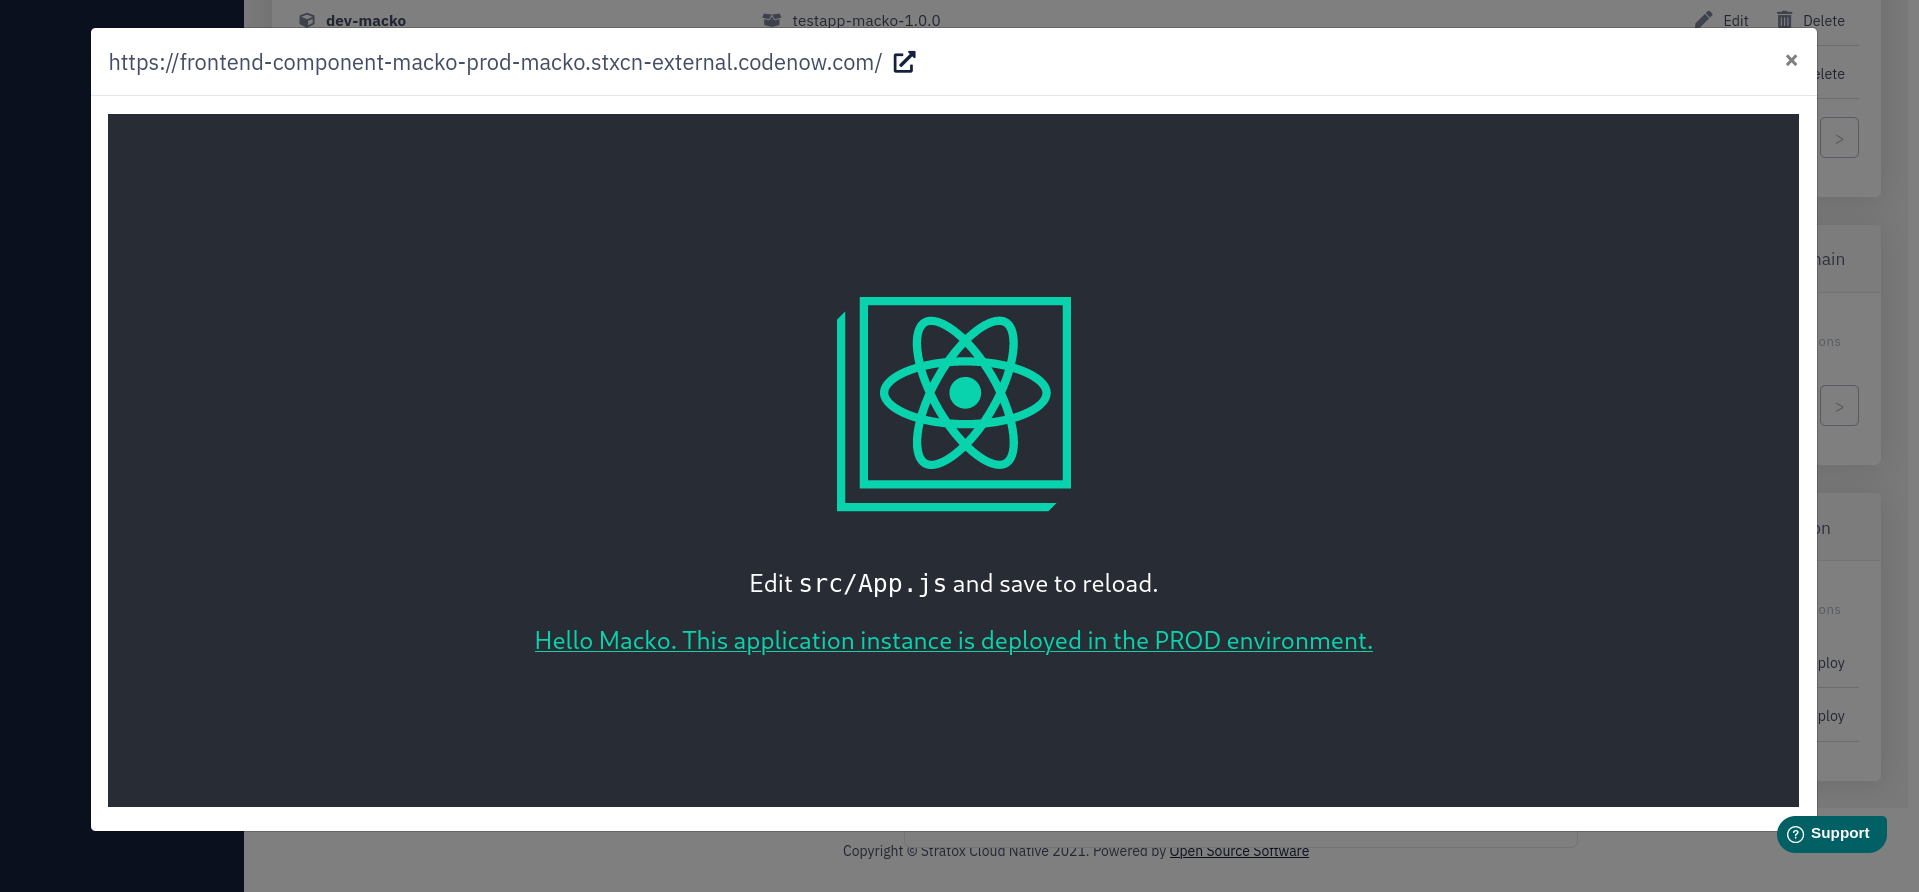
Navigate to the deployed application detail and access the front-end API from the integrated browser (
Open in browser). -
You should see a web page with your and Environment name in the hyperlink. Make a screen capture.
-
Repeat the steps for the both Environments (dev and test).
Task 8 - Send DONE report
- Send DONE message (email/slack message)
- Subject: CN onboarding Part1 DONE -
<YourLastName> - To: Your Manager
- Cc: [email protected]
- Body:
- Hi, Part 1 is done.
<YourLastName> - Screenshot and URL of your deployed application to dev environments
- Screenshot and URL of your deployed application to test environments
- URL of your application in CodeNOW (e.g.
https://playground.codenow.com/applications/testapp-<YourLastName>)
- Hi, Part 1 is done.
- Subject: CN onboarding Part1 DONE -