Secure your Spring Boot REST API with Keycloak
🕓 40 minutes
What you’ll learn
- How to add security to your REST API built on SpringBoot.
- How to install a Keycloak managed service in CodeNOW.
- How to configure the Keycloak basics.
- Basic concepts of authorization and authentication using Keycloak, OAUTH2.
Project Source
This sample project can be cloned from: https://gitlab.cloud.codenow.com/public-docs/java-spring-boot-demo/java-spring-boot-rest-api-secured-by-keycloak
Prerequisites
- You are already familiar with CodeNOW basics.
- You have successfully built a REST API application component with Spring Boot scaffolder. See the How To Create Simple Spring Boot REST API tutorial.
- You have already set up the project in your local development environment and imported into your IDE.
- You are already familiar with Postman (REST client) basics.
Keycloak installation and setup
Follow Get New Keycloak tutorial
Securing our SpringBoot application
-
Add the following dependencies to
pom.xml<dependency>
<groupId>org.springframework.boot</groupId>
<artifactId>spring-boot-starter-security</artifactId>
</dependency>
<dependency>
<groupId>org.keycloak</groupId>
<artifactId>keycloak-spring-boot-starter</artifactId>
</dependency>
<dependency>
<groupId>org.keycloak</groupId>
<artifactId>keycloak-spring-security-adapter</artifactId>
<version>10.0.0</version>
</dependency>
and also under the dependency management
<dependency>
  <groupId>org.keycloak.bom</groupId>
  <artifactId>keycloak-adapter-bom</artifactId>
  <version>10.0.0</version>
  <type>pom</type>
  <scope>import</scope>
</dependency>
- Add the Keycloak adapter configuration class as follows:
package org.example.service.config;

import org.keycloak.adapters.springboot.KeycloakSpringBootConfigResolver;
import org.keycloak.adapters.springsecurity.KeycloakConfiguration;
import org.keycloak.adapters.springsecurity.authentication.KeycloakAuthenticationProvider;
import org.keycloak.adapters.springsecurity.config.KeycloakWebSecurityConfigurerAdapter;
import org.springframework.beans.factory.annotation.Autowired;
import org.springframework.boot.web.servlet.ServletListenerRegistrationBean;
import org.springframework.context.annotation.Bean;
import org.springframework.context.annotation.Import;
import org.springframework.security.config.annotation.authentication.builders.AuthenticationManagerBuilder;
import org.springframework.security.config.annotation.method.configuration.EnableGlobalMethodSecurity;
import org.springframework.security.config.annotation.web.builders.HttpSecurity;
import org.springframework.security.core.authority.mapping.SimpleAuthorityMapper;
import org.springframework.security.web.authentication.session.NullAuthenticatedSessionStrategy;
import org.springframework.security.web.session.HttpSessionEventPublisher;

@KeycloakConfiguration
@EnableGlobalMethodSecurity(prePostEnabled = true)
@Import({KeycloakSpringBootConfigResolver.class})
public class KeycloakAdapterConfig extends KeycloakWebSecurityConfigurerAdapter {

     /* Registers the KeycloakAuthenticationProvider with the authentication manager.*/

    @Autowired
    public void configureGlobal(AuthenticationManagerBuilder auth) throws Exception {
        KeycloakAuthenticationProvider keycloakAuthenticationProvider = keycloakAuthenticationProvider();
        keycloakAuthenticationProvider.setGrantedAuthoritiesMapper(new SimpleAuthorityMapper());
        auth.authenticationProvider(keycloakAuthenticationProvider);
    }

    /* Defines the session authentication strategy.*/

    @Bean
    @Override
    protected NullAuthenticatedSessionStrategy sessionAuthenticationStrategy() {
        return new NullAuthenticatedSessionStrategy();
    }
    @Override
    protected void configure(HttpSecurity http) throws Exception
    {
        super.configure(http);
        http.authorizeRequests();
    }
}
- Configure the connection to Keycloak service. Add the following values to our
/codenow/config/application.yaml.
keycloak:
  realm: sample
  auth-server-url: http://mfr-keycloak-keycloak.box.codenow-dev.codenow.com/auth
  resource: api
  public-client: true
  bearer-only: true
Please note:
realm: is our realm configured in Keycloak admin.
auth-server-url: is our authorization endpoint (see above).
resource: is our Client ID.
4. Finally, secure our endpoints with @PreAuthorize annotation. Don't forget to replace api-role parameter with the role name, that you've entered in Keycloak setup.
@RestController
@RequestMapping("/customers")
public class CustomerController {
    @Autowired
    CustomerService customerService;

    @PreAuthorize("hasRole('api-role')")
    @GetMapping
    public List<Customer> getAll() {
        return customerService.getAll();
    }

    @PreAuthorize("hasRole('api-role')")
    @GetMapping("/{id}")
    public ResponseEntity<Customer> getCustomer(@PathVariable int id) {
        Customer customer = customerService.getById(id);

        if (customer != null)
            return new ResponseEntity<>(customer, HttpStatus.ACCEPTED);
        else
            return new ResponseEntity<>(HttpStatus.NOT_FOUND);
    }
}
Testing in the local environment
-
If you need to change the configuration parameters, for example the TCP port, please do so in
codenow/config/application.yaml. -
Build and run our application. By default it runs on http://localhost:8080/customers
-
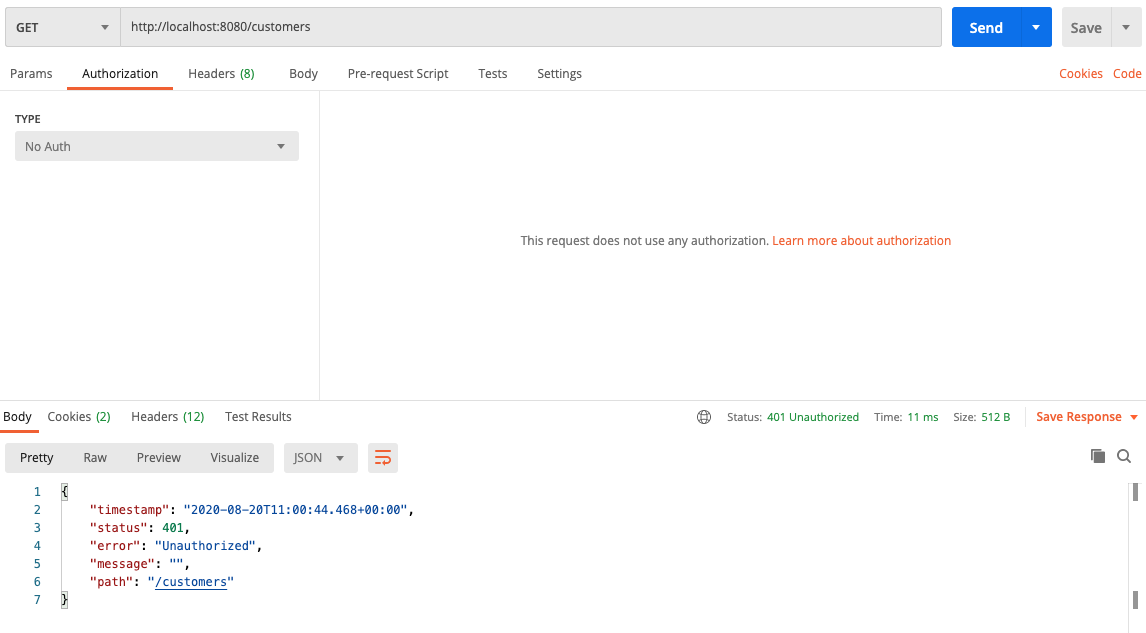
Open the request in Postman, select "No Auth" as authorization type. You should receive a "401 Unauthorized" response

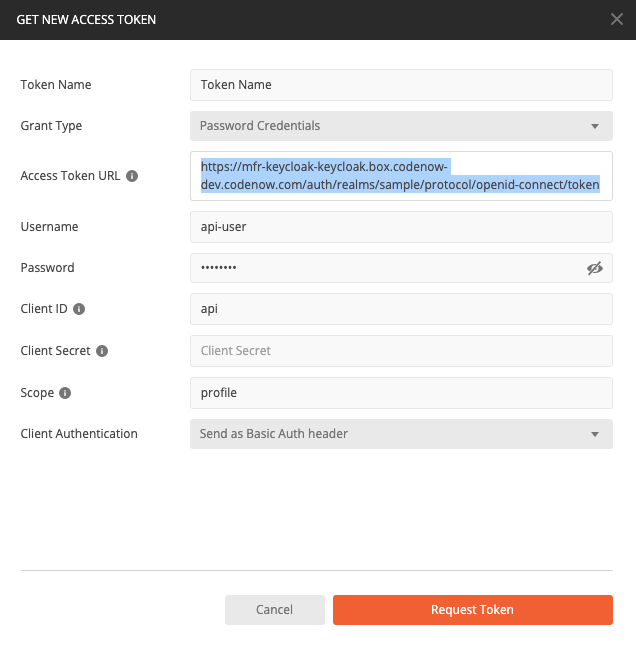
- Change the authorization type to "OAUTH2" and click on "Get New Access Token".
- Enter the Access Token URL, Username, Password and Client ID. Those have been set up in the "Keycloak installation and setup" chapter. Fill Scope field.

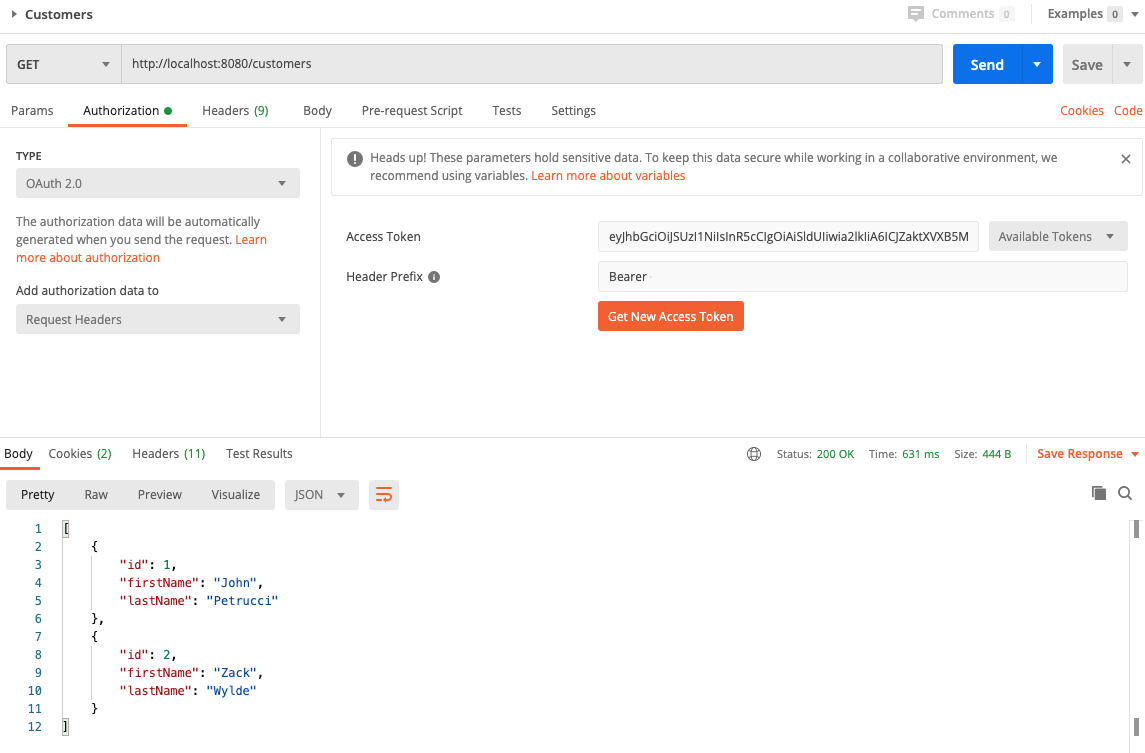
- You should get a new token, click on "Use Token"
- Send the request again and this time you should get the correct response.

Deploy to CodeNOW
If your code works in the local development, you are ready to push your changes to GIT and try to build and deploy your new component version to the CodeNOW environment.
- Check the Get New Keycloak user manual to get CodeNOW managed component properties.
- Connect created Keycloak service to your component Connect Service to Component - Manual Configuration, if you didn't done so during creation of the component.
- For more information about application deployment, see the Application Deployment and Deployment Monitoring tutorials.
What’s next?
See our other developer tutorials: