Java Spring Boot REST Server with Redis and Kafka
🕓 40 minutes
What you’ll learn
How to set up your application for :
- connecting to Redis,
- connecting to Kafka and publishing messages to its topic,
- getting data from REST API,
- providing data to REST API.
In this tutorial, we will create a simple java component with the Java Spring Boot scaffolder. We want to expose a single REST endpoint for getting user authorization roles. As roles are stored in Redis key-value store, we need a client configuration for our component. Any access to information about user roles should be logged in a Kafka topic, so we need a Kafka client configuration too.

Project source
This example project can be cloned from: http://gitlab.cloud.codenow.com/public-docs/java-spring-boot-demo/java-spring-boot-rest-server-with-kafka-and-redis.git
Prerequisites
- Prepare your local development environment for CodeNOW with Spring Boot.
- Follow the tutorial instructions in the Java Spring Boot Local Development tutorial.
- Run Kafka and Redis locally.
- You can run them directly or using docker compose.
- The configuration file for docker-compose can be downloaded from the link that can be found in the section Docker compose and third-party tools of the Java Spring Boot Local Development tutorial.
- Create a new component
- For details, see the section Prerequisites of the Java Spring Boot Local Development tutorial.
Steps
Open your IDE, import the created component and start coding:
-
Define the message payload. Here is an example of
UserAuthorizationResponse, which is a simple POJO with user roles:-
generate getters and setters with your IDE
package io.codenow.client.authorization.service.model;

import java.util.Set;

public class UserAuthorizationResponse {

        private Set<String> roles;

    //getters and setters...
}
-
-
Next prepare the configuration for the kafka logging client:
-
Go to the Kafka administration console (http://localhost:9000 if using kafdrop from our Local development manual) and create a new topic client-logging
-
Add maven dependency to your
pom.xml<dependency>
<groupId>org.springframework.kafka</groupId>
<artifactId>spring-kafka</artifactId>
<version>2.4.5.RELEASE</version>
</dependency>
-
-
For more details about Spring Boot Kafka, see: https://spring.io/projects/spring-kafka
-
Now add this code below to your
Application.classto create bean configuration for kafka:@Value("${kafka.broker.url}") private String kafkaBrokerUrl;
@Bean
RouterFunction<ServerResponse> routerFunction() {
return route(GET("/swagger/index.html"), req ->
ServerResponse.temporaryRedirect(URI.create("/swagger-ui/")).build());
}
@Bean
WebFilter traceResponseFilter() {
return new TraceResponseFilter();
}
@Bean
public ProducerFactory<String, String> producerFactory() {
return new DefaultKafkaProducerFactory<>(producerConfigs());
}
@Bean
public Map<String, Object> producerConfigs() {
Map<String, Object> props = new HashMap<>();
props.put(ProducerConfig.BOOTSTRAP_SERVERS_CONFIG, kafkaBrokerUrl);
props.put(ProducerConfig.KEY_SERIALIZER_CLASS_CONFIG, StringSerializer.class);
props.put(ProducerConfig.VALUE_SERIALIZER_CLASS_CONFIG, StringSerializer.class);
// See https://kafka.apache.org/documentation/#producerconfigs for more properties
return props;
}
@Bean
public KafkaTemplate<String, String> kafkaTemplate() {
return new KafkaTemplate<String, String>(producerFactory());
} -
Next prepare the configuration for the Redis client:
-
For more details about Spring Boot Redis, see: https://spring.io/projects/spring-data-redis
-
Add maven dependency to your pom.xml.
-
These dependencies are the starter for using Redis key-value data store with Spring Data Redis and the Lettuce client
<dependency>
  <groupId>org.springframework.boot</groupId>
  <artifactId>spring-boot-starter-data-redis</artifactId>
  <version>2.3.3.RELEASE</version>
</dependency>
-
-
Create a new configuration class for redis
RedisConfig.class:import io.lettuce.core.RedisClient;
import io.lettuce.core.RedisURI;
import io.lettuce.core.api.StatefulRedisConnection;
import io.lettuce.core.api.sync.RedisCommands;
import org.springframework.beans.factory.annotation.Value;
import org.springframework.context.annotation.Bean;
import org.springframework.context.annotation.Configuration;
import org.springframework.data.redis.repository.configuration.EnableRedisRepositories;
@Configuration
@EnableRedisRepositories
public class RedisConfig {
@Value("${spring.redis.url}")
private String uri;
@Bean
public RedisCommands connectionFactory() {
RedisURI redisURI = RedisURI.create(uri);
RedisClient redisClient = RedisClient.create(redisURI);
StatefulRedisConnection<String, String> redisConnection = redisClient.connect();
return redisConnection.sync();
}
} -
Create a new controller and put all the parts together
-
For more details about Spring Boot controller, see: https://spring.io/guides/gs/rest-service/
import io.lettuce.core.api.sync.RedisCommands;
import org.example.service.model.UserAuthorizationResponse;
import org.slf4j.Logger;
import org.slf4j.LoggerFactory;
import org.springframework.beans.factory.annotation.Autowired;
import org.springframework.beans.factory.annotation.Value;
import org.springframework.kafka.core.KafkaTemplate;
import org.springframework.web.bind.annotation.*;

import java.util.List;
import java.util.TreeSet;

@RestController
@RequestMapping("/user")
public class UserAuthorizationController {
    Logger log = LoggerFactory.getLogger(UserAuthorizationController.class);

    @Autowired
    private RedisCommands<String,String> commands;

    private String kafkaTopicName;
    private String kafkaTopicKey;
    private KafkaTemplate<String, String> kafkaTemplate;

    public UserAuthorizationController(@Value("${kafka.topic.name}") String kafkaTopicName,
                                        KafkaTemplate<String, String> kafkaTemplate,
                                        @Value("${kafka.topic.key}")  String kafkaTopicKey)
    {
        this.kafkaTopicName = kafkaTopicName;
        this.kafkaTopicKey = kafkaTopicKey;
        this.kafkaTemplate = kafkaTemplate;
    }

    @GetMapping("/{username}")
    private UserAuthorizationResponse user(@PathVariable String username) {
        log.info("Get data for username: {}", username);
        kafkaTemplate.send(kafkaTopicName, kafkaTopicKey, username);

        final UserAuthorizationResponse response = new UserAuthorizationResponse();
        List<String> privileges = commands.lrange(username, 0L, 1000L);
        response.setRoles(new TreeSet<>(privileges));
        return response;
    }
}
-
-
Last but not least, append the configuration for Kafka and Redis to
codenow/config/application.yaml-
Note that this configuration depends on your local development setup for Kafka and Redis and can be different case-by-case
-
Make sure you follow yaml syntax (especially whitespaces)
spring:
    redis:
        url: redis://localhost:6379

kafka:
  broker:
    servers: localhost:29092
  topic:
    name: client-logging
    key: client-authorization-service
-
-
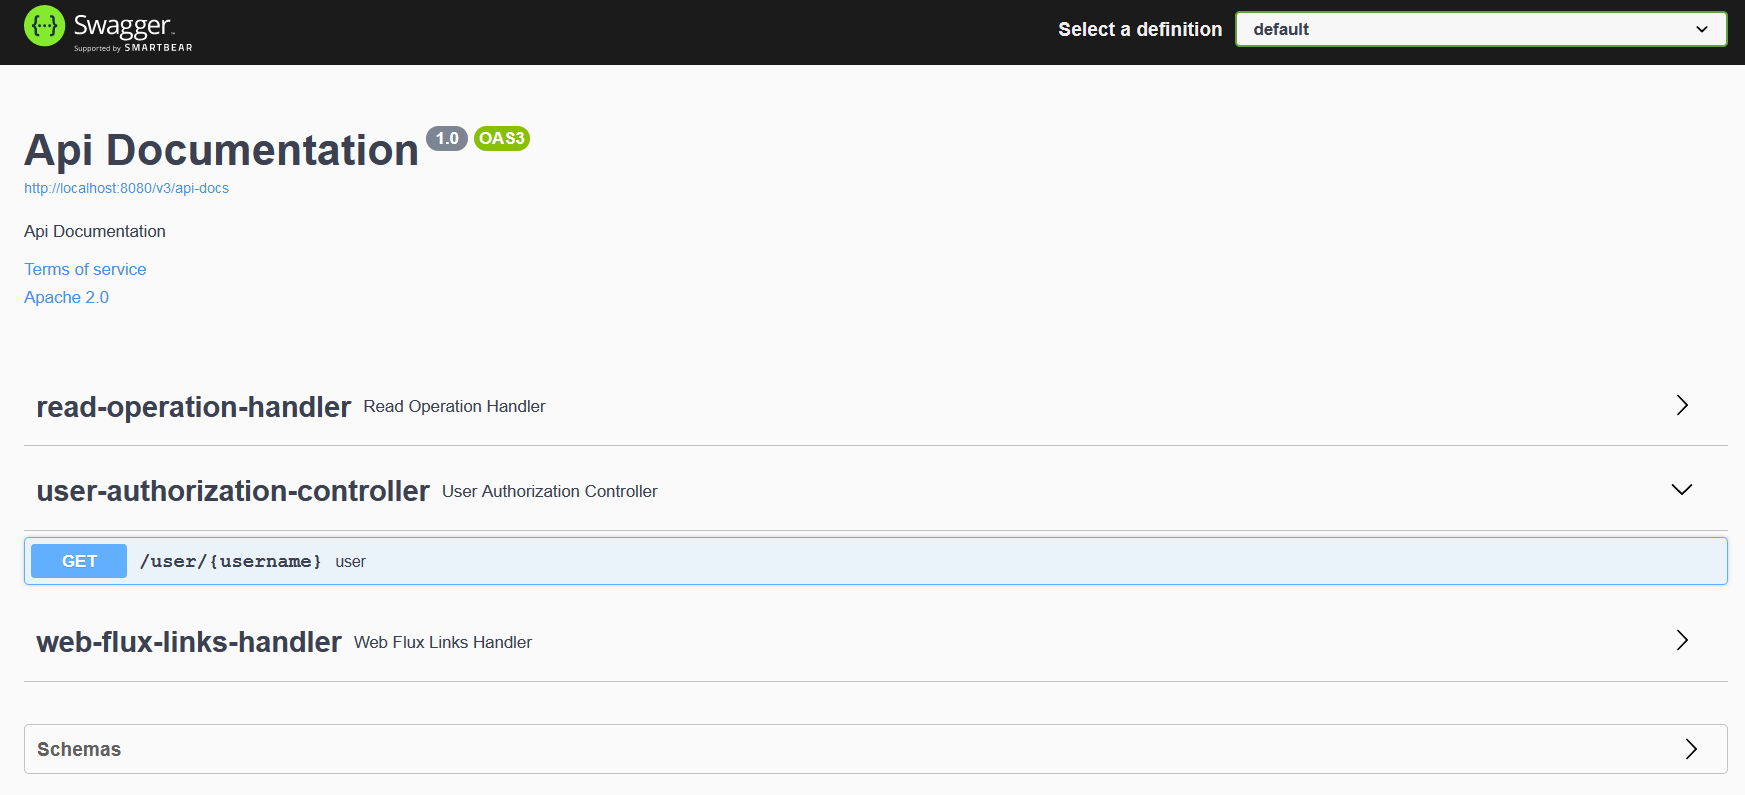
Try to build and run the application in your IDE. After startup, you should be able to access your new controller’s swagger: http://localhost:8080/swagger/index.html
- For correct setup, check the
README.mdin the project root or see the tutorial Java Spring Boot Local Development, section Prepare local development IDE
- For correct setup, check the
Deploy to CodeNOW
If your code works in the local development, you are ready to push your changes to GIT and try to build and deploy your new component version to the CodeNOW environment.
- Check Get New Redis and Get New Apache Kafka for setup in the CodeNOW environment.
- Make sure to change the application.yaml properties from the local to the production setup.
- For more information about application deployment, see the Application Deployment and Deployment Monitoring tutorials.
What’s next?
See our other developer tutorials: