Java Spring Boot REST Server with RabbitMQ
🕓 40 minutes
What you’ll learn
How to set up your application for:
- connecting to RabbitMQ,
- getting data from REST API,
- providing data to REST API.
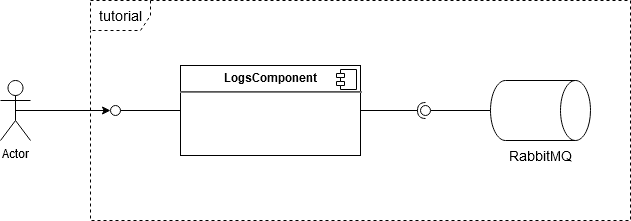
In this tutorial, we will create a simple java component with the Java Spring Boot scaffolder. We want to expose two simple REST endpoints for creating and getting logs using the RabbitMQ queue.
The image below shows the diagram of the future application. Inside the LogsComponent is a simple logic, which stores log messages in the RabbitMQ queue and is available to return them via the REST API.
Project source
This example project can be cloned from: http://gitlab.cloud.codenow.com/public-docs/java-spring-boot-demo/java-spring-boot-rest-server-with-rabbitmq.git
Prerequisites
- Prepare your local development environment for CodeNOW with Spring Boot.
- Follow the instructions in the Java Spring Boot Local Development tutorial.
- Run RabbitMQ locally.
- You can run RabbitMQ directly or using docker compose.
- Create a new component
- For details, see the section Prerequisites of the Java Spring Boot Local Development tutorial.
Steps
Preparation
Open your IDE, import the created component and start coding:
-
Define the message payload. Here is an example of the Log, which is a simple POJO with basic client data:
- Generate getters and setters with your IDE.
public class Log {

private String message;
private String date;

//... getters + setters
}
Open your pom.xml file and import the dependencies below:
-
These dependencies will allow you to integrate any tool that uses the AMPQ message protocol.
<dependency>
    <groupId>org.springframework.boot</groupId>
    <artifactId>spring-boot-starter-amqp</artifactId>
    <version>2.4.1</version>
</dependency>
For more details about the AMPQ message protocol, see: https://www.amqp.org/about/what
RabbitMQ configuration
Create a new java class to store a bean definition for the RabbitMQ configuration.
-
In this case, the file is called
RabbitConfiguration.java. -
Don't forget to add a Spring Boot
@Configurationannotation to this class. For more information about the @Configuration, see: https://docs.spring.io/spring-framework/docs/current/javadoc-api/org/springframework/context/annotation/Configuration.htmlimport org.springframework.amqp.core.Binding;
import org.springframework.amqp.core.BindingBuilder;
import org.springframework.amqp.core.FanoutExchange;
import org.springframework.amqp.core.Queue;
import org.springframework.beans.factory.annotation.Value;
import org.springframework.context.annotation.Bean;
import org.springframework.context.annotation.Configuration;
@Configuration
public class RabbitConfiguration {
@Value("${fanout.exchange}")
private String fanoutExchange;
@Value("${queue.name}")
private String queueName;
@Bean
Queue queue() {
return new Queue(queueName, true);
}
@Bean
FanoutExchange fanoutExchange() {
return new FanoutExchange(fanoutExchange);
}
@Bean
Binding binding(Queue queue, FanoutExchange fanoutExchange) {
return BindingBuilder.bind(queue).to(fanoutExchange);
}
}
Let's take a detailed look at this configuration class:
- The
@Valueannotation contains a queue name and fanout exchange property that are read from theapplication.yamlfile. - The
queue()bean creates a new AMQP queue for storing our logs to. The second argument specifies the queue to be durable so that the queue and any messages on it won't be removed when RabbitMQ is stopped. - The
fanoutExchange()bean creates a new exchange with the type equals to fanout. The fanout exchange just broadcasts all the messages it receives to all the queues it knows. - The
binding()method binds the queue and fanout exchange together, defining the behavior that occurs whenRabbitTemplatepublishes to an exchange.
Create a Producer
Now, we will create a Producer that will send logs to a RabbitMQ queue.
-
For this purpose we are using the
RabbitTemplate, provided by the Spring Boot framework.import com.fasterxml.jackson.core.JsonProcessingException;
import com.fasterxml.jackson.databind.ObjectMapper;
import org.example.service.model.Log;
import org.springframework.amqp.rabbit.core.RabbitTemplate;
import org.springframework.beans.factory.annotation.Autowired;
import org.springframework.beans.factory.annotation.Value;
import org.springframework.stereotype.Component;
@Component
public class QueueProducer {
@Value("${fanout.exchange}")
private String fanoutExchange;
private final RabbitTemplate rabbitTemplate;
@Autowired
public QueueProducer(RabbitTemplate rabbitTemplate) {
this.rabbitTemplate = rabbitTemplate;
}
public void produce(Log log) throws JsonProcessingException {
rabbitTemplate.setExchange(fanoutExchange);
rabbitTemplate.convertAndSend(new ObjectMapper().writeValueAsString(log));
}
} -
Inside the
convertAndSend()method theObjectMapperconverts the Log entity into the JSON, so it can be stored in the queue as a string.
Create a Consumer
To get messages from the queue, we need to create a QueueConsumer class.
import com.fasterxml.jackson.core.JsonProcessingException;
import com.fasterxml.jackson.databind.ObjectMapper;
import org.example.service.model.Log;
import org.springframework.amqp.rabbit.core.RabbitTemplate;
import org.springframework.beans.factory.annotation.Autowired;
import org.springframework.beans.factory.annotation.Value;
import org.springframework.stereotype.Component;

@Component
public class QueueConsumer {

    private final RabbitTemplate rabbitTemplate;

    @Value("${queue.name}")
    private String queueName;

    @Autowired
    public QueueConsumer(RabbitTemplate rabbitTemplate) {
        this.rabbitTemplate = rabbitTemplate;
    }

    private String receiveMessage() {
        String message = (String) rabbitTemplate.receiveAndConvert(queueName);
        return message;
    }

    public Log processMessage() throws JsonProcessingException {
        String message = receiveMessage();
        return new ObjectMapper().readValue(message, Log.class);
    }
}
Create a Controller
Next, create a new controller and put all the parts together
-
For more details about the spring REST controller, see: https://spring.io/guides/gs/rest-service/
import com.fasterxml.jackson.core.JsonProcessingException;
import org.example.service.config.QueueConsumer;
import org.example.service.config.QueueProducer;
import org.example.service.model.Log;
import org.springframework.beans.factory.annotation.Autowired;
import org.springframework.http.HttpStatus;
import org.springframework.http.ResponseEntity;
import org.springframework.stereotype.Controller;
import org.springframework.web.bind.annotation.GetMapping;
import org.springframework.web.bind.annotation.PostMapping;
import org.springframework.web.bind.annotation.RequestMapping;

@Controller
@RequestMapping("/")
public class LogsController {

    @Autowired
    private QueueProducer queueProducer;

    @Autowired
    private QueueConsumer queueConsumer;

    @GetMapping
    public ResponseEntity<?> getLogs() throws JsonProcessingException {
        Log log = queueConsumer.processMessage();
        return new ResponseEntity<Log>(log, HttpStatus.OK);
    }

    @PostMapping
    public ResponseEntity<?> storeLog(Log log) throws JsonProcessingException {
        queueProducer.produce(log);
        return new ResponseEntity<Log>(HttpStatus.CREATED);
    }
}
Update an application.yaml file
Add a RabbitMQ connection to the application.yaml file.
-
Your configuration file should look like this:
server:
  port: 8080
spring:
  main:
    banner-mode: off
  zipkin:
    enabled: false
  rabbitmq:
    host: localhost
    port: 5672
    username: {username}
    password: {password}
queue:
  name: {"queue_name"}
fanout:
  exchange: {"exchange_name"}
management:
  endpoints:
    web:
      exposure:
        include: health, prometheus
Run the project in the local environment
Try to build and run the application in your IDE.
-
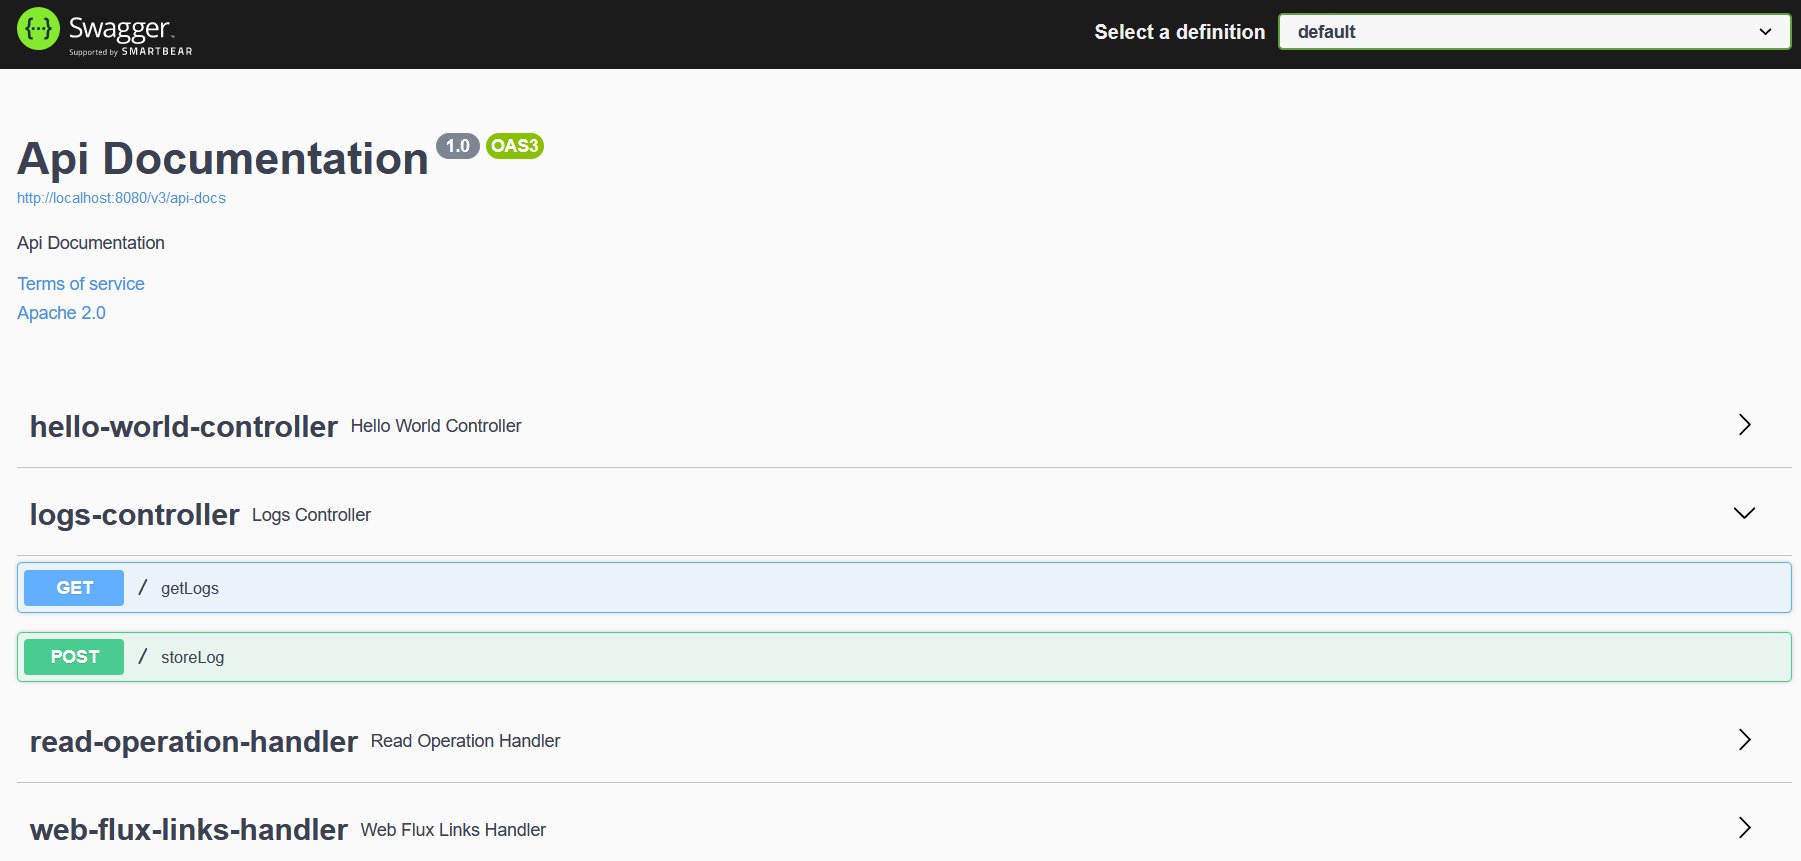
After startup, you should be able to access your new controller’s swagger: http://localhost:8080/swagger/index.html
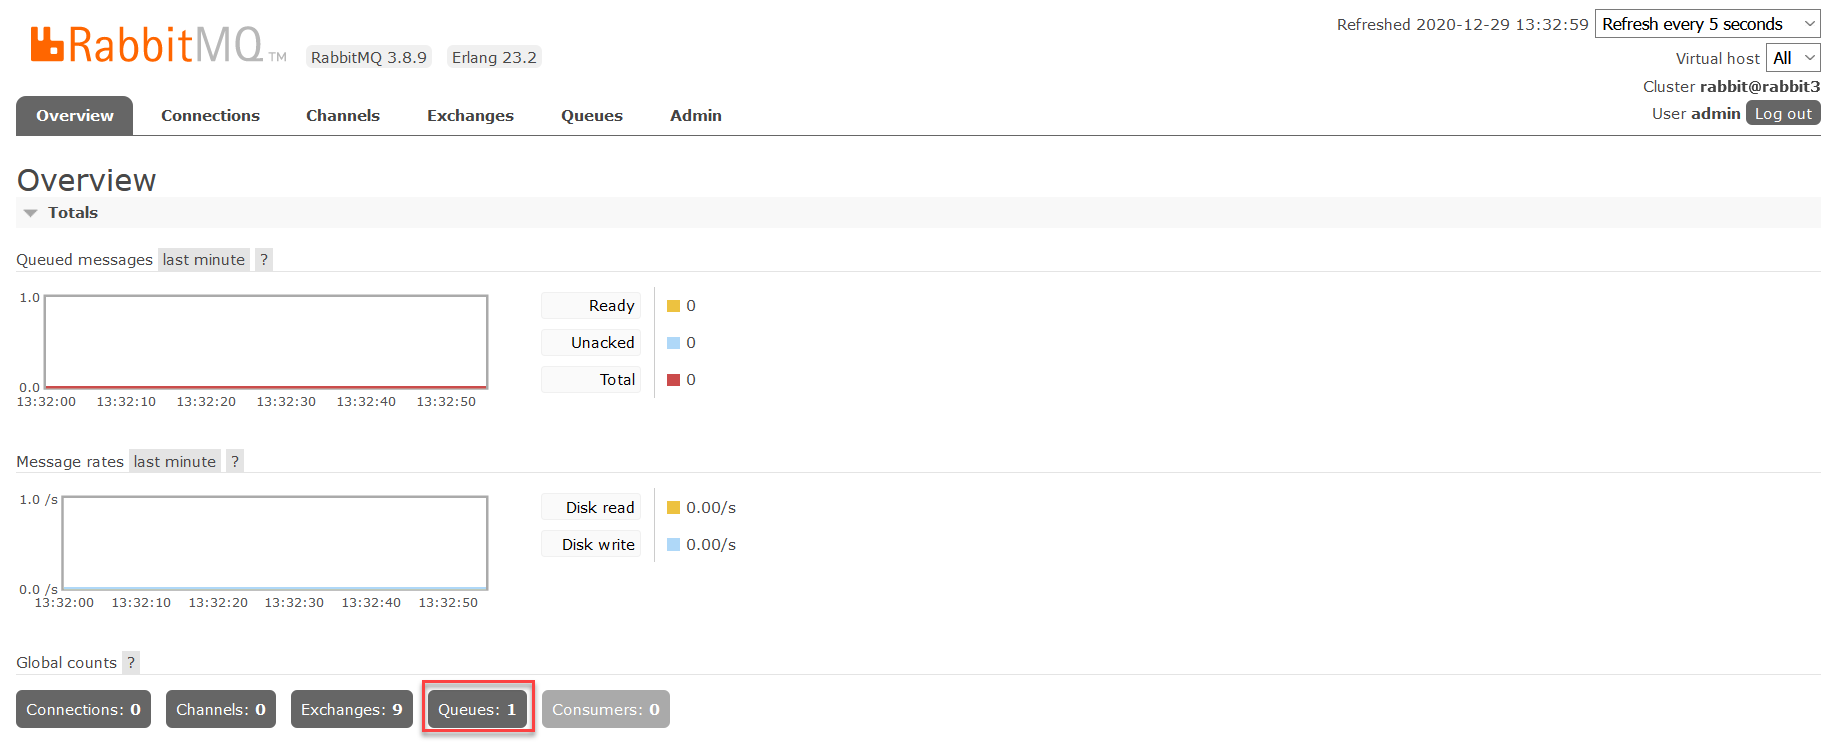
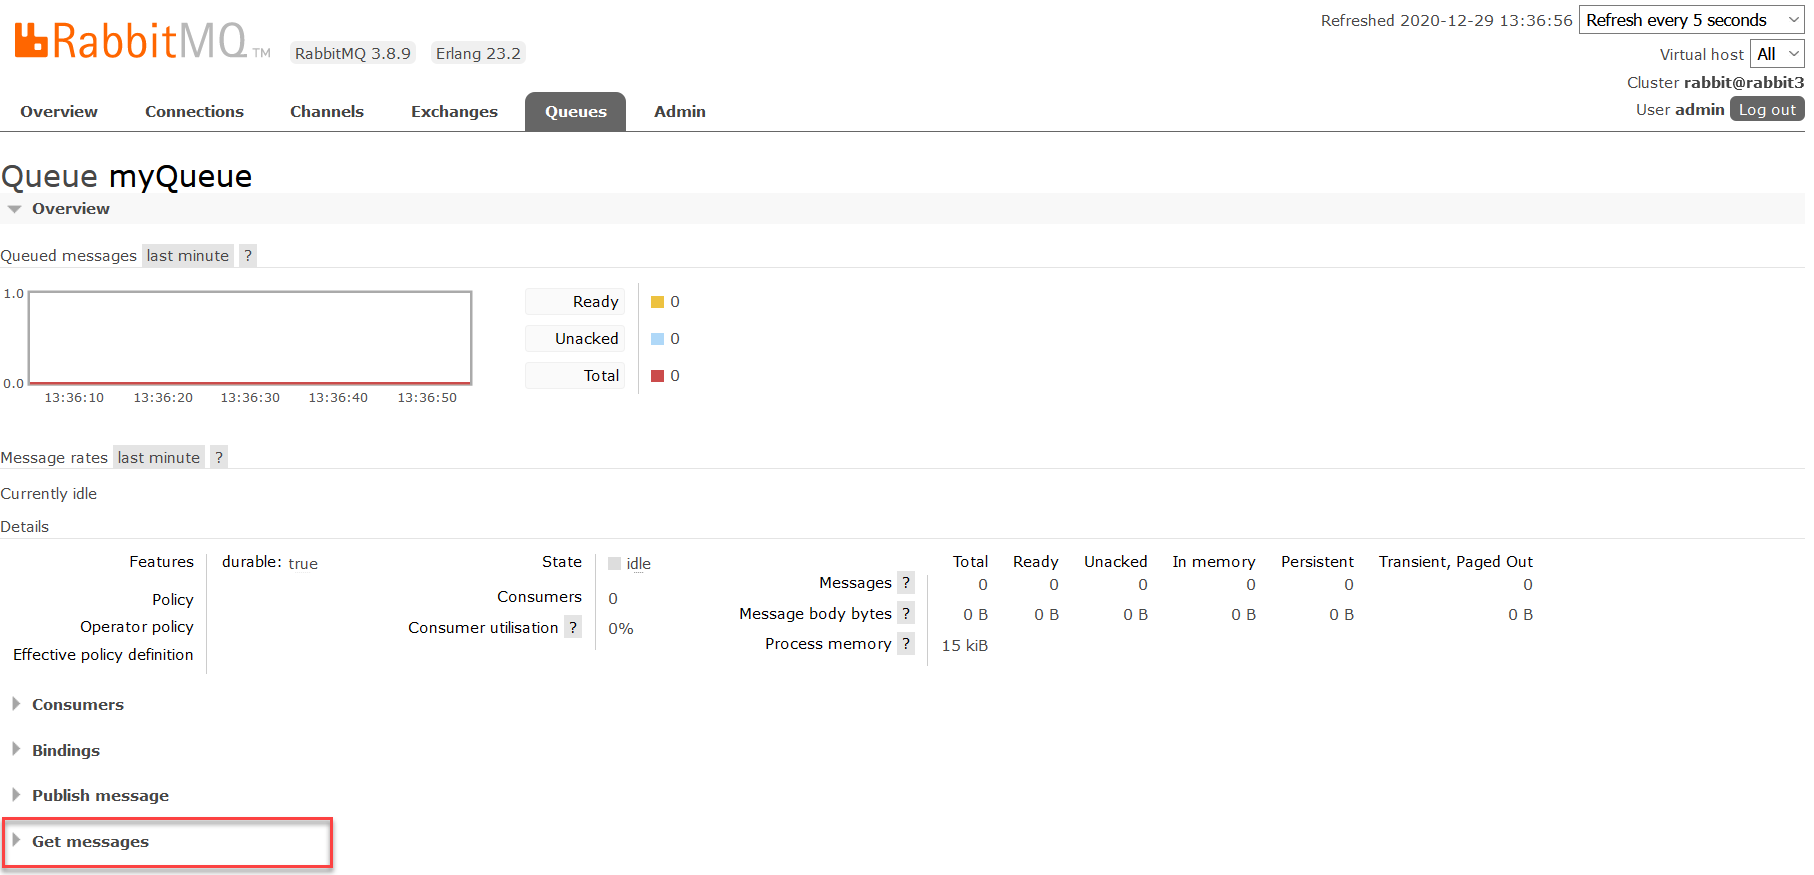
Try to post a new log. Then go to the RabbitMQ management panel that should be available at the http://localhost:15672 address.
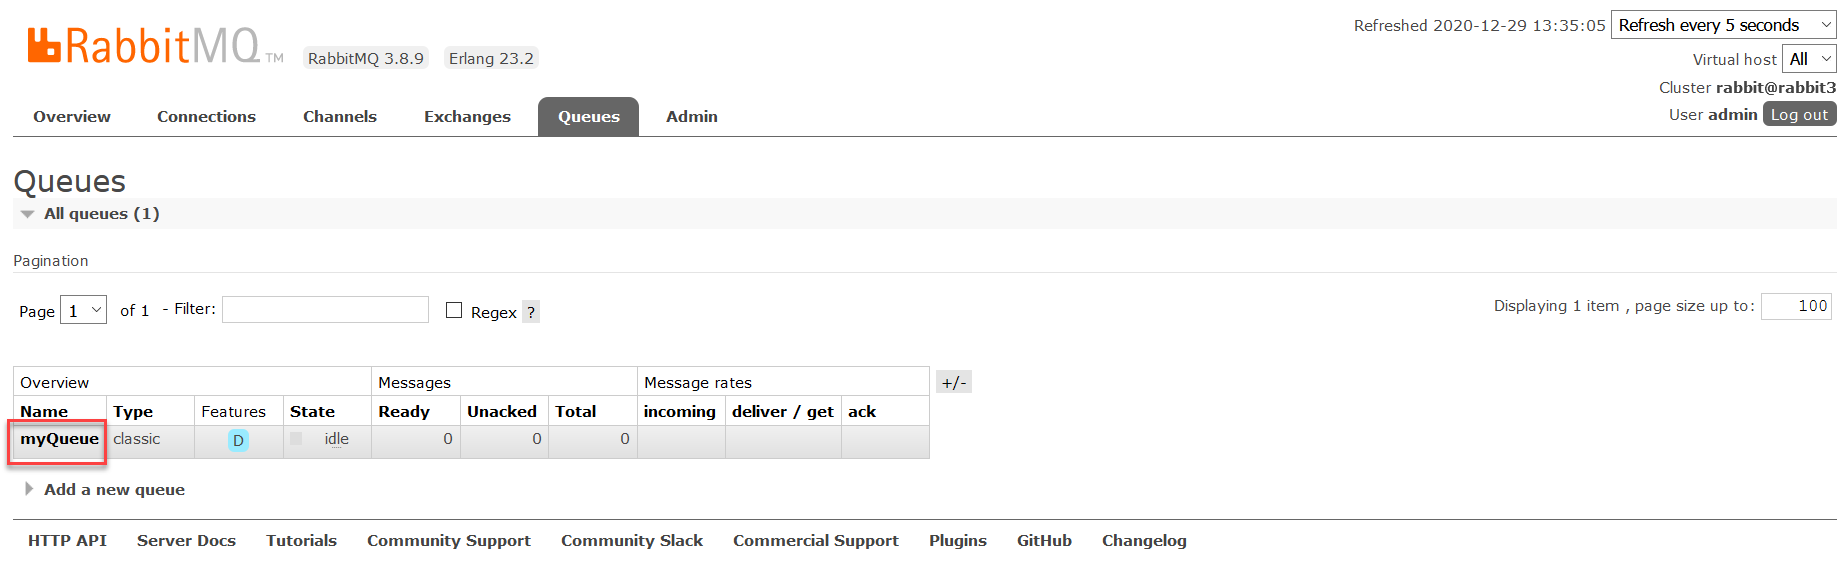
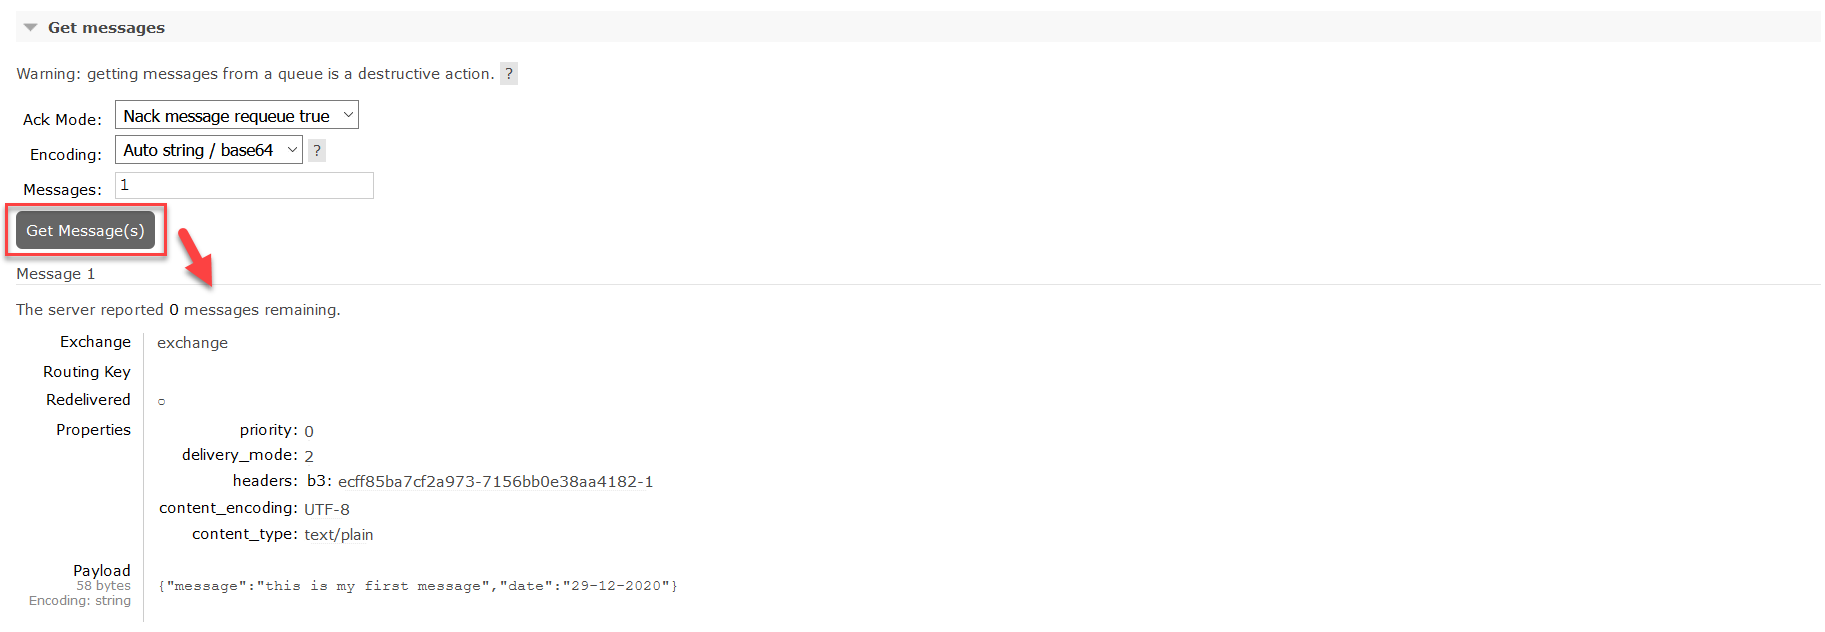
-
In the queues section you can see your newly created queue. Click on its name and you will see the details related to the chosen queue. Look at the "Get messages" section, extend it, click on the "Get message(s)" button and you will see the last posted message.
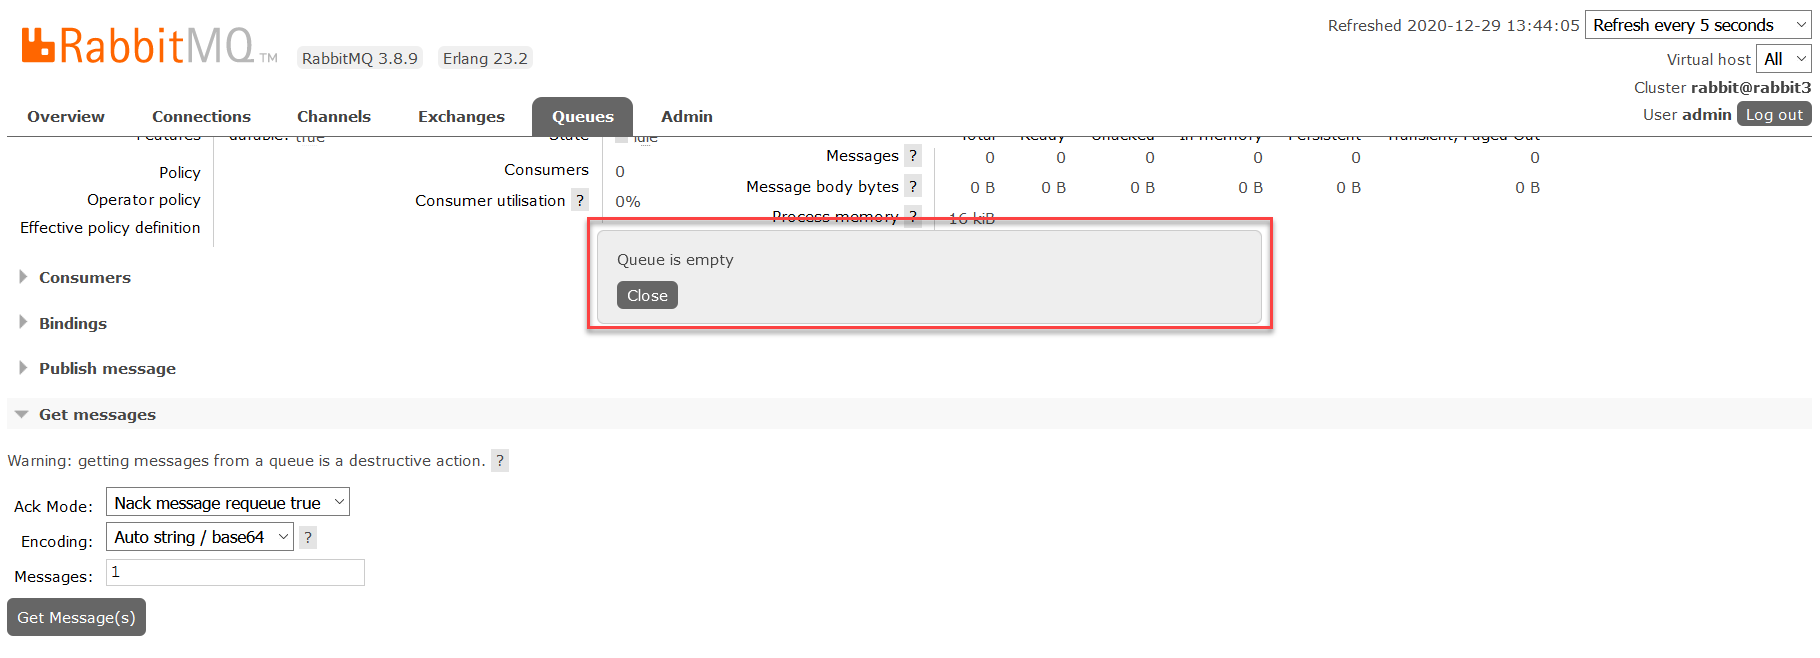
Go to Swagger-UI once again and get the log.
-
Now look at the stored messages in the RabbitMQ management panel once again. Now you should see the notification that the queue is empty, because you received the last message that was stored.
Deploy to CodeNOW
If your code works in the local development environment, you are ready to push your changes to GIT and try to build and deploy your new component version to the CodeNOW environment.
- Check [Get New RabbitMQ] for setup in the CodeNOW environment.
- Make sure to change the application.yaml properties from the local to the production setup.
- For more information about application deployment, see the Application Deployment and Deployment Monitoring tutorials.
What’s next?
See our other developer tutorials: